Overview
ShipperHQ supports an extensive set of UPS® services across domestic, international, small package, and alternate delivery options. This article covers the various types of UPS carriers, some configuration settings, and the process for setting the carrier up.
As a UPS Ready® provider, ShipperHQ is pleased to announce we are eligible for payment under UPS Digital Connections (formerly UPS CTP). More information is available on our UPS Ready page.
If you’re looking to offer Ship to a UPS Access Point® Location as an option for your customers, you can do this at no cost with a free ShipperHQ Plan supporting UPS Access Point. This free offering supports only basic display options. More information is available on our Promotions & Savings page.
Available UPS Services
Domestic and International Small Package
The UPS small package carrier discussed in this article covers the majority of domestic and international small package services provided by UPS both ground and air services worldwide.
Setting up UPS small package services
Ship to a UPS Access Point Location
Offering the option for customers to ship their order to a UPS Access Point location is supported using the UPS Access Point carrier.
UPS Ground with Freight Pricing
UPS Ground with Freight Pricing (GFP) provides a competitive rating structure for non-palletized multi-packaged shipments within the 48 contiguous US states. GFP applies for shipments over 150 lbs but composed of multiple packages each under 150 lbs and not containing hazardous material. This service requires a GFP contract in place with UPS.
Setting up UPS Ground with Freight Pricing
UPS SurePost
ShipperHQ supports UPS SurePost (sometimes called UPS Ground Saver), though since it is a contract-only service provided by UPS you will need to contact us to enable it for you. Once enabled, you can see as a new carrier option in the Marketplace allowing you to install UPS SurePost.
UPS Mail Innovations
UPS does not currently offer the capability to retrieve Mail Innovations shipping rates in real-time. However, Mail Innovations shipping rates are straight-forward and can be set up manually using a Custom Table Rate carrier.
UPS My Choice
UPS My Choice gives customers the option to sign up for real-time delivery updates after placing their order increasing visibility and customer satisfaction. With the ShipperHQ My Choice integration, merchants on Adobe Commerce and Magento 2 can offer customers the option to easily set up a UPS My Choice account after placing an order.
UPS Hundredweight
UPS Hundredweight Services is a contract-only discounted rate that applies to certain multi-package domestic US shipments. ShipperHQ has built-in support for UPS Hundredweight Service.
Details on UPS Hundredweight Service
Adding UPS
Now that you have your credentials ready, use the steps below to set up UPS in ShipperHQ.
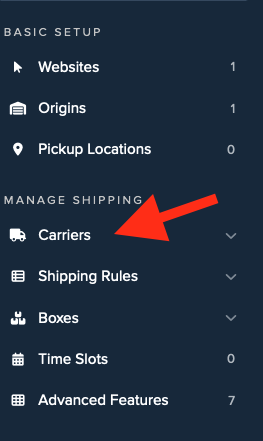
1. Log into your ShipperHQ account & navigate to the Carriers link on the left navigation menu.
2. Click + New to add a new carrier

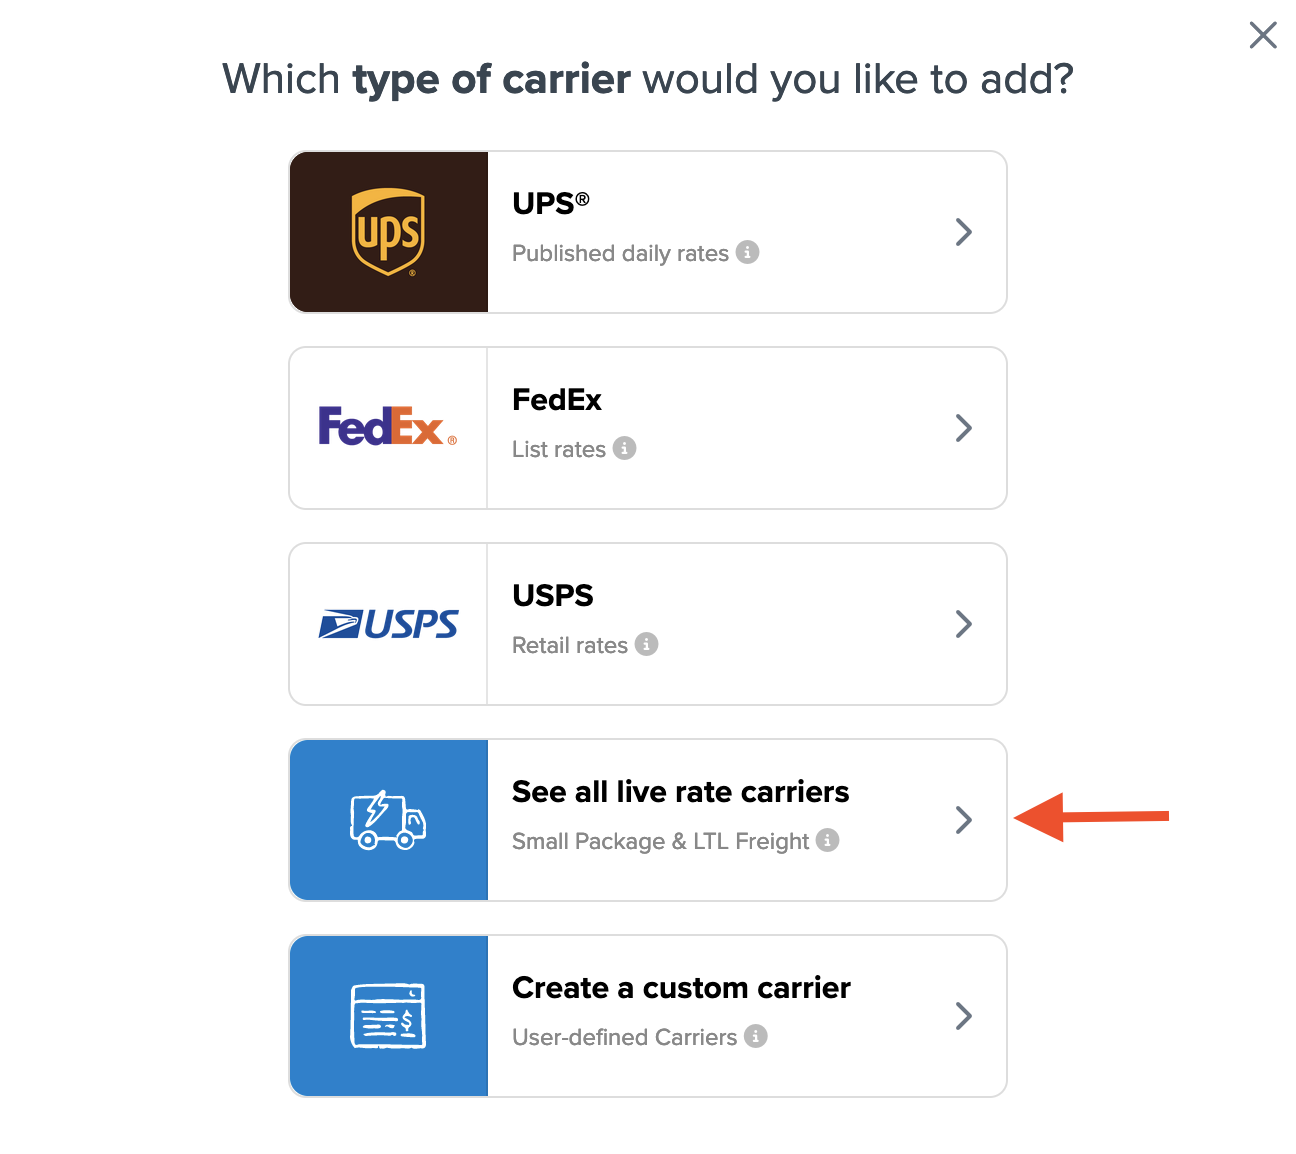
3. Choose the Live Rate Carrier option
4. Use the Search Carriers option to search for UPS or scroll down to find UPS from the list of available carriers
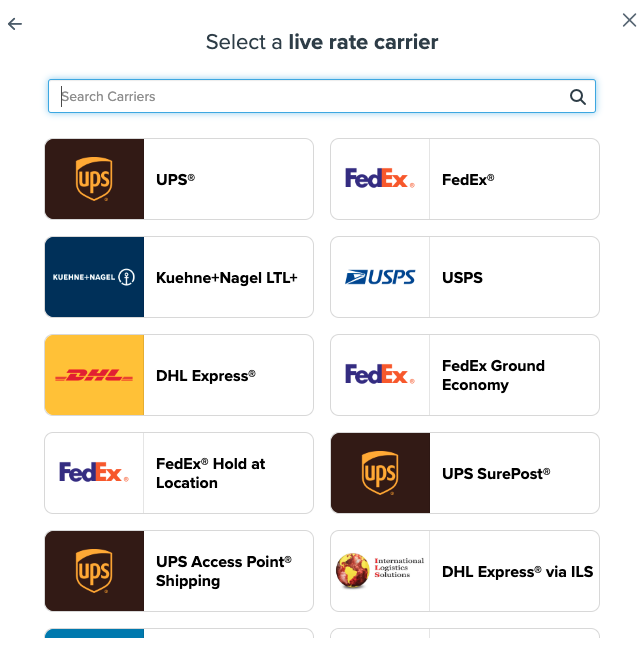
5. Click to continue in connecting your carrier account to ShipperHQ.
Connecting to Your Account
To retrieve your UPS Account rates (sometimes called Negotiated Rates) or use contract-only UPS services, you’ll need to take a few additional steps.
Required Information
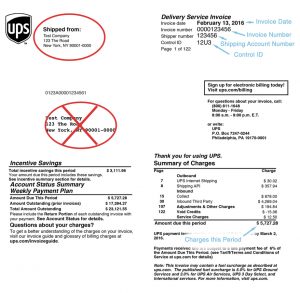
If you have not received an invoice from UPS in the past 90 days, you’ll only need your UPS Account Number and the Shipping Address associated with your UPS account. If you have received an invoice in the past 90 days, you’ll need the following information from your most recent invoice:
- Ship from address
- Invoice date
- Invoice number
- Shipper number
- Control ID (if present)
- Charges this period
You can use a physical copy of your most recent invoice or download it from UPS:
- Log into the UPS Billing Center
- Click My Invoices in the navbar
- Choose the most recent invoice (paid or unpaid) and click the Download icon to download a PDF of the invoice
If you don’t currently have a UPS account and wish to set one up, you can do so in minutes and get access to discounted UPS rates.
Validating Your UPS Account
Once you have the required account information, you can connect your ShipperHQ account to your UPS account with a few steps. This can be done when adding a UPS carrier by clicking Would you like to display your UPS account rates? and choosing Enter account information or, if you have a UPS carrier set up already, clicking the Enter Credentials button shown when editing your carrier in ShipperHQ. Either way, you’ll be presented with the following steps:
- Enter your contact and company information
- Enter the Pickup Address associated with your UPS account and click Continue
Configuring UPS
Once you’ve added a UPS carrier, you’ll be able to configure it to fit your needs. This section reviews some of the most commonly used configuration options.
Basic Settings
In the Basic tab on your UPS carrier, you’ll find several configuration options related to how your UPS account works.
Carrier Overview
These settings are primarily related to how your carrier shows to customer and within the ShipperHQ dashboard as well as what Origins it is available from.
Carrier Titles
The Carrier Title in Checkout will be the name shown for this carrier to your customers. For example, if you set this to “UPS” then customers would see “UPS – UPS® Ground” for UPS Ground. The Carrier Title Internal is the title used within the ShipperHQ dashboard. It may be useful to set this to a more descriptive name (e.g. “New York UPS Account”) to allow you to easily identify this carrier.
Assigned Origins
When used with the ShipperHQ Multi-Origin Shipping Advanced Feature allows you to assign this carrier to specific Origins set up in your ShipperHQ account.
More about Multi-Origin Shipping
Account Settings
The Account Settings section relates to how ShipperHQ communicates with UPS and what additional services you may wish to include in your UPS rates.
Rate Types
UPS has four types of rates, also called Customer Classification Codes. It’s important to note that ShipperHQ does not provide UPS classification codes. If you offer a certain rate to your customers it’s important to ensure that you can actually ship at those rates. Talk to your UPS representative to determine which customer classification code applies to your account.
- Rates Associated with Shipper Number: The most common option. Uses your negotiated shipping rates
- Retail Rates: Applies to shippers without UPS Scheduled Pickup service who ship from a UPS retail location such as The UPS Store® or a UPS Customer Center
- Standard List Rates: Applies to shippers who have a UPS agreement with Standard List Rates or a UPS Scheduled Pickup account established after January 2, 2011.
- Daily Rates: Applies to shippers who have an existing customer account which provides Daily Rates or UPS Scheduled Pickup service and was established prior to January 3, 2011. For more information, please visit the UPS Daily Rates page
Origin of Shipment
This is used to tell ShipperHQ and UPS where your shipments will be shipped from. If you’re unsure which option applies to your account, speak to your UPS account rep.
Pickup method
These options are related to how UPS picks up or receives your packages. For most merchants, Regular Daily Pickup is the recommended option if you have a UPS Scheduled Pickup service. Alternately, if you drop off your UPS packages at a The UPS Store location or a UPS Customer Center, choose Customer Counter.
Packaging container
This is used to tell UPS what type of package you will be using to ship. For most merchants, the default Customer Packaging is the recommended choice. Only choose a different option if you use that specific packaging for your shipments.
Unit of Weight
Used to tell ShipperHQ what Unit of Weight to use when retrieving rates from UPS for your UPS shipments. If both your UPS and ShipperHQ accounts are set up in pounds choose Lbs and if they’re set up in kilograms choose Kgs. If your ShipperHQ account is set up in pounds but your UPS account uses kilograms, choose Convert LBS to KG.
Delivery Confirmation
Lets you choose the type of delivery confirmation required for your packages. Basic delivery confirmation is included in nearly all UPS services but if your shipments require a signature on delivery choose Signature Required and if your shipments require an adult signature choose Adult Signature Required.
Send Declared Value to Carrier
Checking this box will tell ShipperHQ to send the declared value of your shipment to UPS. This may incur additional charges if the amount of the shipment exceeds the insurance amount included in UPS services by default.
For certain options in Account Settings (e.g. Delivery Confirmation and Send Declared Value to Carrier), UPS may add an additional charge for these services to the rates returned to ShipperHQ.
Shipping Methods
Selecting Shipping Methods here tells ShipperHQ what Shipping Methods you may wish to offer to your customers. Selecting a Shipping Method does not mean it will be shown for all orders. Instead, think of it as a list of possible Shipping Methods. For example, International services will only be offered for international orders and vice versa for domestic services.
Additionally, if you wish to only offer certain services in certain scenarios you would select them here but then use Shipping Rules to control which options are shown when.
Using Shipping Rules to control Shipping Methods
Carrier Service Area
This is used to control the Zone or Zones this carrier is allowed for. For example, you may have a certain carrier you only wish to use when shipping domestically and another you only wish to use when shipping internationally. Zones can be as broad or as specific as you need them to be from multiple countries down to specific regions, postal codes, or cities.
While the Carrier Service Area restrictions are concrete and apply to all shipments, you may wish to use Shipping Rules to restrict when this carrier is offered based on more granular criteria. For example, only limiting the carrier to a certain Zone for shipments containing products assigned to certain Shipping Groups.
Date & Time Settings
Date & Time settings are available when using the Date & Time Advanced Feature and allow you to show additional delivery information to your customers.
Configuring Date & Time Settings on your Carrier
Package Settings
Setting up how ShipperHQ should handle package weights and dimensions for your carrier is important to ensure accurate shipping rates. Package Settings are especially powerful when used in conjunction with the Dimensional Packing Advanced Feature, though many of these settings are available without this feature.
These settings allow you to set up limits around when this carrier will be shown. For example, you may not wish to show this carrier for shipments over a certain weight. Additionally, these allow you to set limits to ensure the carrier’s maximum weights and dimensions are respected.
Fees Settings
These settings allow you to handle additional fees or adjustments to the rates returned by the carrier.
Handling Fees
With Handling Fees you can easily surcharge or discount the amount returned by the carrier to account for either additional costs or provide a cheaper rate to your customers. Handling Fees can be used in conjunction with or instead of Shipping Rules. Handling Fees are quicker to configure but don’t offer the same level of flexibility as Shipping Rules.
Return Shipping Options
ShipperHQ doesn’t produce Return Shipping labels, but our Return Options at Checkout functionality allows you to offer a paid return service to your customers at checkout. This option is available on certain ShipperHQ plans.
More info on Return Shipping Options
Optional Settings
Optional settings are not commonly used but may apply to certain scenarios. Most optional settings relate to specific Advanced Features.
Restrictions
Shown when using the LTL Freight Advanced Feature, the Show this Carrier even when over Freight Weight Threshold or Must Ship Freight tells ShipperHQ to show this carrier even for freight shipments. This may be useful if you wish to offer customers the choice between a more expensive small package shipping option and a cheaper but slower LTL freight option.
More info on Weight Thresholds
Prioritize Carrier
Available when using the Rate Shopping & Custom Method Names Advanced Feature, this option lets you tell ShipperHQ to hide another carrier if this carrier is available. For example, you may wish to always use UPS if it’s available but use USPS if UPS is not available. In this case, you’d select USPS here on your UPS carrier.
More info on Carrier Prioritization
Error Handling
These settings tell ShipperHQ what to do when no rates are available for this carrier. On some eCommerce platforms this can include setting a specific error message to show customers at checkout.
Free Shipping Promotions
You can choose for ShipperHQ to set one or more Shipping Methods to free when a free shipping promotion applies to either a product in the cart or to the entire cart. This can be used in conjuction with settings on your eCommerce platform. It’s also possible to set up a Free Shipping Custom Carrier in ShipperHQ if you wish to show a “Free” option instead of a $0 rate for a carrier service. Or, you can use Shipping Rules to set more granular scenarios in which you wish to offer free shipping.
Additional Settings
This section relates specifically to the address type used when rating with this carrier. Depending on what Advanced Features you have enabled you’ll see different options in this section.
No Address Type-related Advanced Features
Without any Advanced Features enabled which related to Address Type, you’ll be able to set the Default Destination Address Type which will be used for all shipments.
If almost all of your orders ship to commercial addresses, we recommend setting this to “Business”. However, if all or a large portion of your orders ship to residential addresses, we recommend setting this to “Residential”. This setting will determine whether or not the carrier’s applicable Residential Delivery fees are applied.
With Address Validation or Address Type Validation
With the Address Validation Advanced Feature, ShipperHQ can automatically determine the address type. When this feature is enabled, you’ll have the option to Use Validated Address Type which will use the automatically-determined address type for rating. If ShipperHQ is unable to determine the address type for a given address, the setting in Default Destination Address Type will be used.
More info on Address Type Validation
With Address Type Selector
The Address Type Selector Advanced Feature gives customers the option to select their address type at checkout on certain eCommerce platforms.
When this feature is enabled, you’ll find the option to Enable Residential/Commercial Selector which when checked will show customers a drop-down where they can select either Residential or Commercial as their address type. The selected type will be used when retrieving rating from the carrier. The Default Destination Address Type setting determines the initial selection when the customer reaches checkout.
More info on Address Type Selector
Specific Configuration Scenarios
Setting up UPS Canada
The configuration for Canada UPS involves adjustments to ensure the correct rating. There are four items that you’ll need to ensure are set up correctly in order to receive correct rates and methods for UPS Canada accounts:
UPS Account Origin
When you have an Origin in Canada and wish to use UPS you must ensure the UPS carrier has the origin of the shipment set to Canada.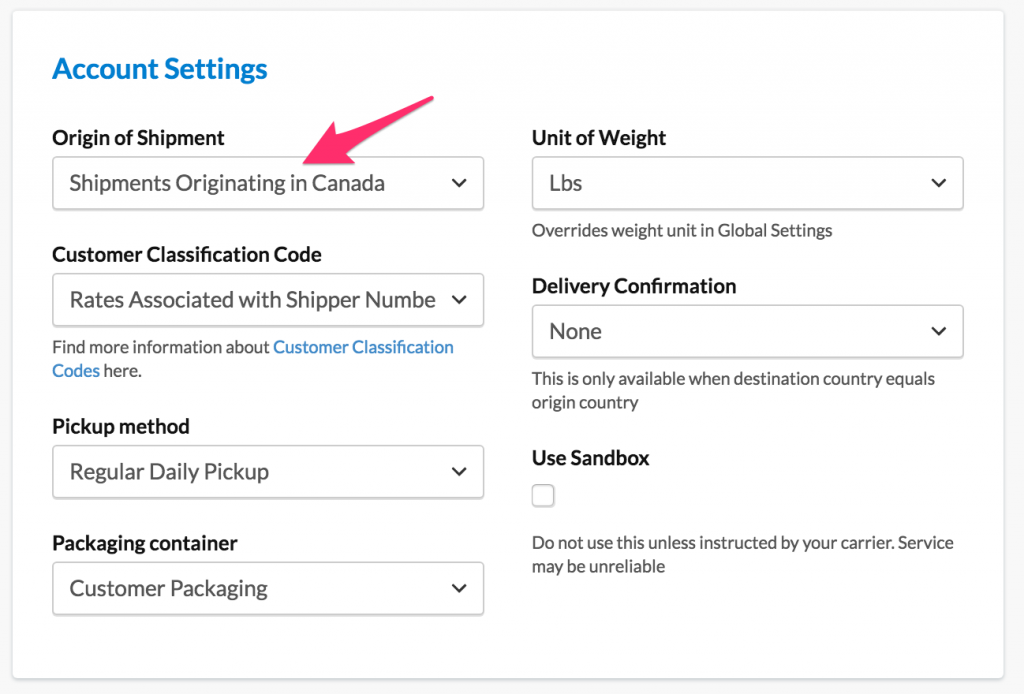
Weight Unit
Choose your weight unit for Canada, what are your product weight units? This is also set in Account Settings->Global Features.
Shipping Methods
Select the Canadian Shipping Methods. Because of a nuance in UPS currently, we map the following shipping methods in the dashboard to methods on the checkout:
- Next Day Air – > maps to Express
- Next Day Air Saver -> maps to Express Saver
- 2nd Day Air -> maps to Expedited
- Standard -> Standard
So for example if you select Next Day Air Saver as an allowed method on the carrier than in the checkout you will see Express Saver as a rate.
The only methods available for domestic Canada shipments are the ones listed above.
Currency Conversion (Magento, Zoey, and Adobe Commerce)
On Magento, Adobe Commerce, or Zoey, you must ensure you allow the currency Canada and setup the conversion rate else you will not see any shipping rates. We return rates in CAD and rely on the platform to convert to store currency.
Setting up UPS Hundredweight Service
If you have an active UPS Hundredweight Service contract in place with UPS, ShipperHQ is able to return your discounted rates for eligible shipments. Note that when Hundredweight Service rates are returned by UPS, there is no visible difference in the shipping option names displayed, but the rates shown will reflect the appropriate UPS Hundredweight Service rates. All requirements of UPS Hundredweight Service apply including:
- UPS installed in ShipperHQ connected to your UPS account and set to use Rates Associated with Shipper Number
- Shipment containing multiple packages
- Shipping from the 48 contiguous US states to the 50 states or Puerto Rico
- Total shipment weight exceeding 200lbs for UPS 3 Day Select or UPS Ground or 100lbs for UPS Next Day Air, UPS Next Day Air Saver, UPS 2nd Day Air AM, or UPS 2nd Day Air
For more details on these requirements, see UPS.com.
Troubleshooting
If your invoice is not accepted on your first attempt, double-check all of your information and please look over the below tips. When you are sure that the below details are correct, please try again. If it fails a second time, please do not try again. Instead, contact the support team for assistance completing registration, as UPS limits the number of attempts to three a day.
The most common causes of registration failures are:
- Not using the most recent invoice UPS has generated. See the Obtaining UPS Invoice/Credentials section above for how to download your most recent invoice.
- Entering the Account or Billing address instead of the Shipped From address on the invoice. The address entered must be the address of the primary location where UPS picks up packages.
- Entering the wrong invoice date or charges this period. These must match exactly what was shown on your UPS invoice.
- Making changes to the carrier’s default settings before registering. If you changed anything about the carrier before attempting register, you must delete this carrier and create a new one. When you have created the new carrier, please register it before making ANY changes.
- No default origin is set on your website. A default origin must be set in order to register your carrier. You can see where to check and correct this on our Website Configuration page.
- Are you 100% sure you’re using a sandbox account? If you haven’t told this to UPS then you most likely don’t have a sandbox account so just make sure sandbox is unchecked on the UPS carrier in ShipperHQ. When you do, have this checked then you will see that the rates are inaccurate so please don’t use unless you are sure you have this type of UPS account and know the limitations of this setting.
Attempting to register unsuccessfully three times disables your account for 24 hours. You can still use your UPS account, but cannot attempt to register for another 24 hours. Please note, ShipperHQ defaults your UPS rates to the Standard List Rates if validation/registration is unsuccessful.
