Overview
Experiencing discrepancies between the shipping rates displayed in ShipperHQ and those expected from your carriers can often be resolved by reviewing and adjusting your account settings. In this article, we’ll provide you with some basic information on why rates might differ and steps you can take to review your settings and ensure accurate shipping rates are quoted at checkout.
Table of Contents- Overview
- Common Causes for Rate Differences
- Steps to Resolve Rate Differences
- Test Your Rates in ShipperHQ
- Verify Carrier Settings
- Boxes & Packing Settings
- Dimensional Packing
- Dimensional Packing Enabled
- Troubleshooting Boxes
- Box Surcharges
- Check Shipping Rules
- Box-Based Shipping Rules
- Surcharges and Discounts
- Confirm Unit Consistency
- Review Dimensions set on Product/Items
- Analyze Store Logs
- Contact Support if Needed
Common Causes for Rate Differences
Shipping rate differences in ShipperHQ can stem from several factors:
- Incorrect carrier settings
- Handling fees
- Practical rate calculation differences
For example, mismatches in carrier account settings or incorrect shipping rules or packing configurations can cause variations in rates. Other considerations, like residential delivery surcharges or different rate types (negotiated versus retail), may also influence rate differences.
It's crucial to align comparisons between ShipperHQ and the carrier's rates on criteria such as service level, weight, packing dimensions, and destination to resolve rate differences.
Steps to Resolve Rate Differences
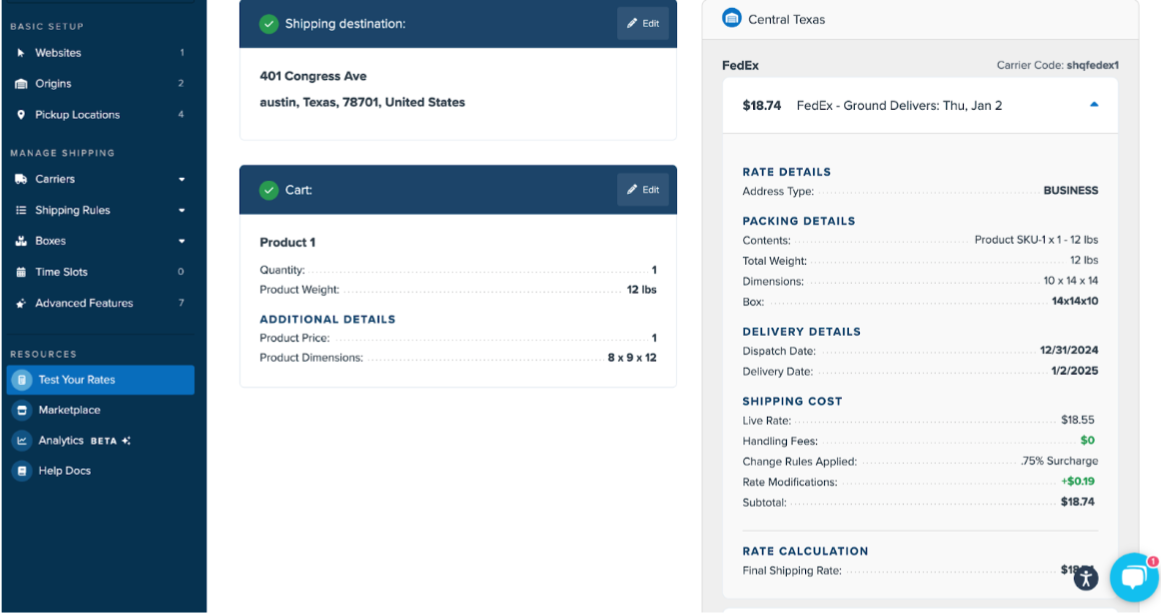
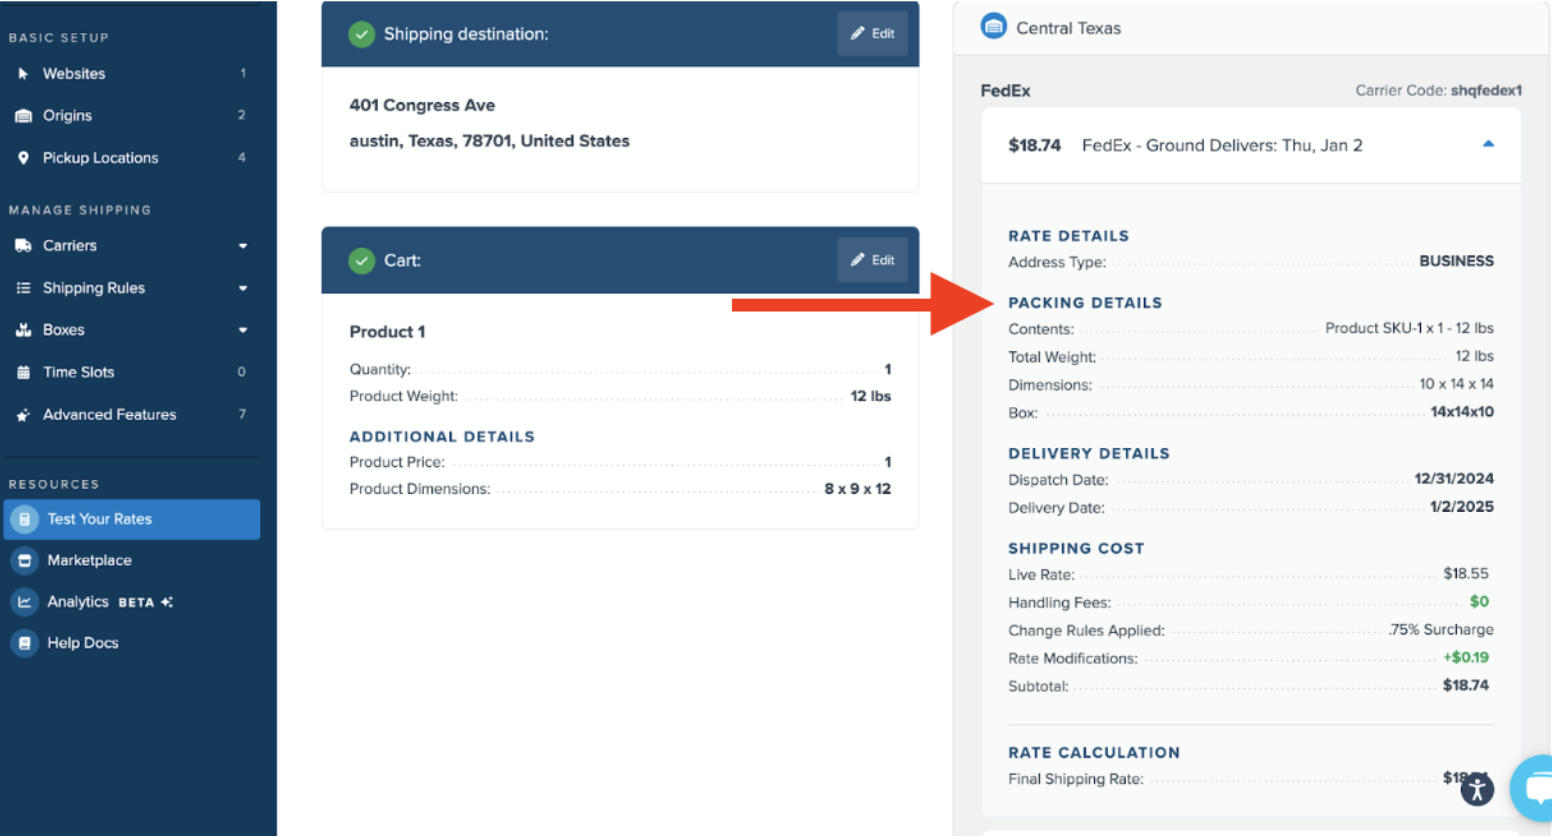
Test Your Rates in ShipperHQ
If the rates shown at checkout don't match your carrier’s expected shipping costs, begin with this essential step. Use ShipperHQ's "Test Your Rates" feature to simulate shipping scenarios and compare them with expectations. This tool helps identify the shipping rates received by ShipperHQ and passed to your site.
Verify Carrier Settings
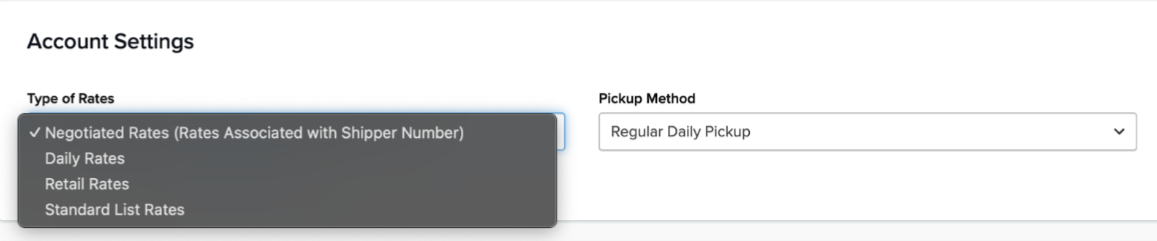
- Rate Types: Ensure the rate types (e.g., negotiated rates, retail rates) match those in your carrier accounts. Navigate to Carriers > select the carrier > Account Settings on the “Basic” tab to check and adjust as needed.
- Handling Fees: Check for handling fees in ShipperHQ that might increase costs. Look under the “Fees” tab for carrier-level fees that override shipping rules.

- Declared Value: Decide if declared value information is sent to carriers. This setting affects rates and can be adjusted under the “Account Settings” in the Carrier’s “Basic” tab.
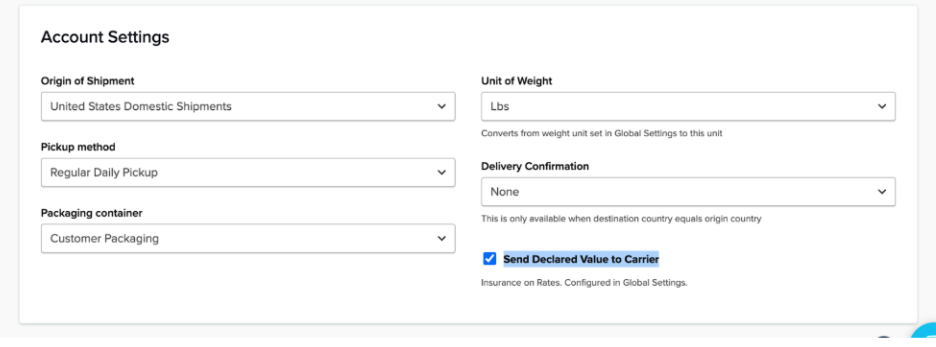
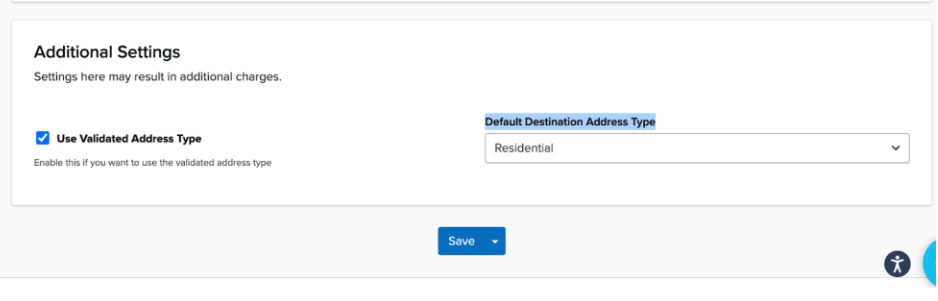
- Residential vs. Commercial Rates: Confirm the address type (residential or commercial) as this classification affects rates. Use Google Maps for verification or consider ShipperHQ’s Address Validation Advanced Feature for automatic detection.
Boxes & Packing Settings
Dimensional Packing
If not using the Dimensional Packing feature, rates are calculated based solely on weight, which can lead to inaccuracies. We encourage enabling this feature to consider both weight and dimensions.
Dimensional Packing Enabled
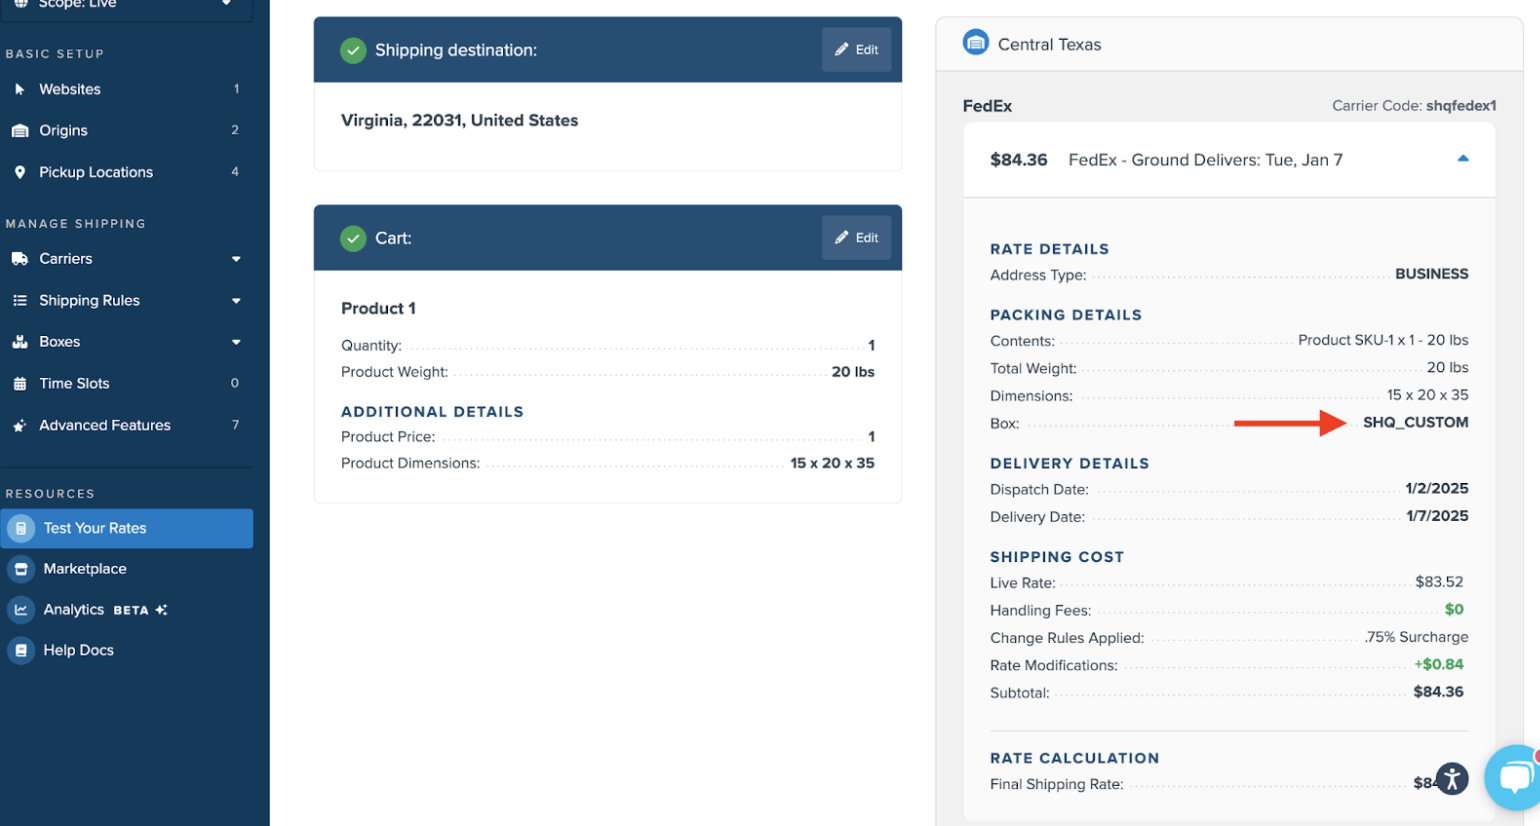
- Packing Boxes: Verify selected boxes are accurate. Incorrect selections can skew rate calculations. Utilize the Rates calculator to review box choices.
- Oversized Items: Ensure configured boxes can fit all items. Oversized items default to incorrect dimensions, impacting rates. If this occurs, boxes will be listed as “SHQ_Custom.”
Troubleshooting Boxes
Refer to this article to view store logs and determine selected boxes. For issues with incorrect box selection, see this document.
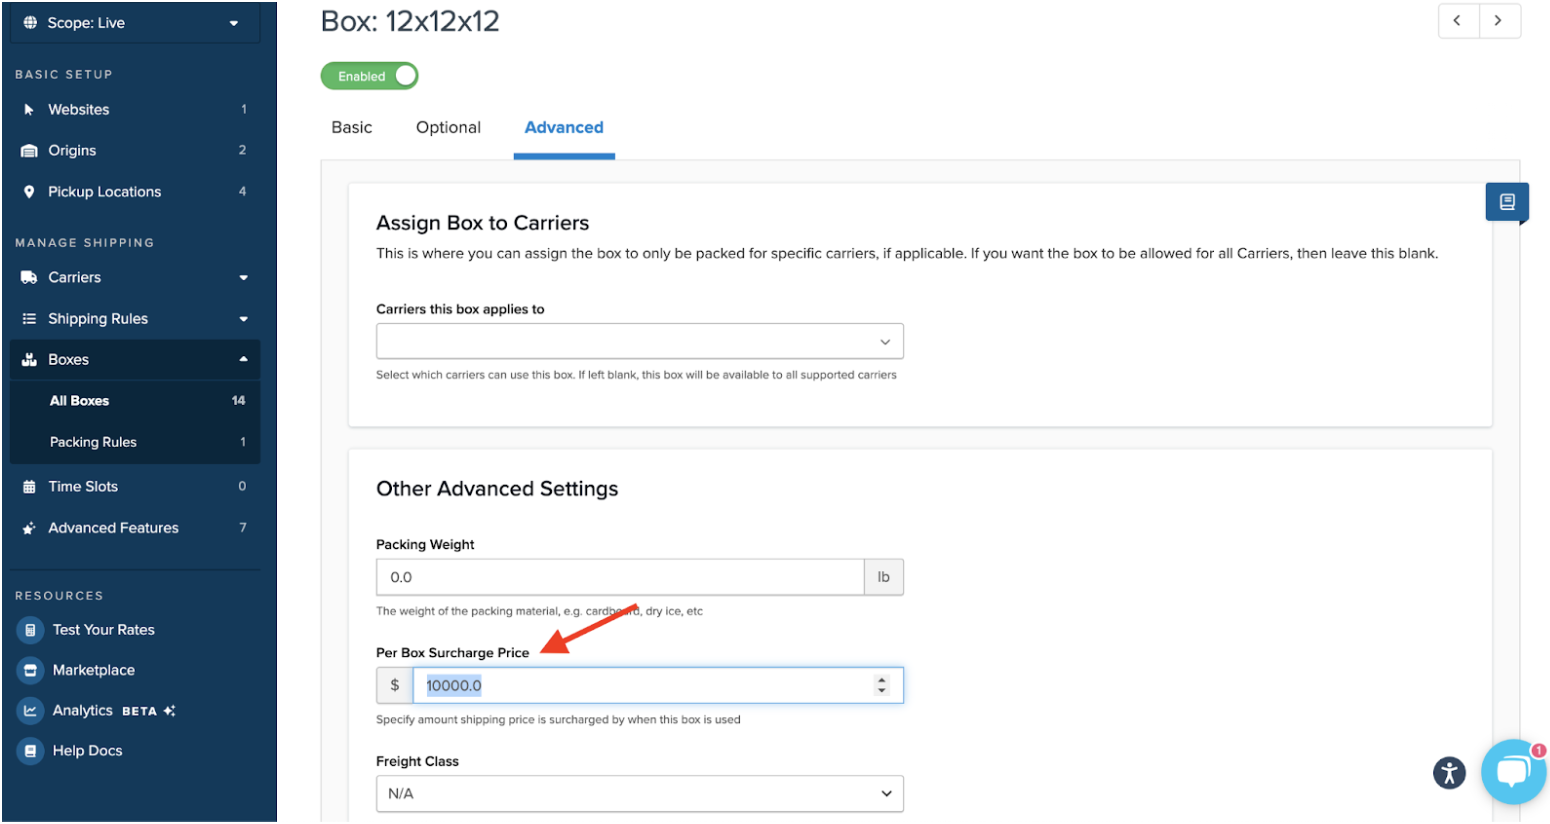
Box Surcharges
Check for surcharges linked to specific boxes. To view, click the box, navigate to the Advanced tab, and locate the Per Box Surcharge Price field.
Check Shipping Rules
Box-Based Shipping Rules
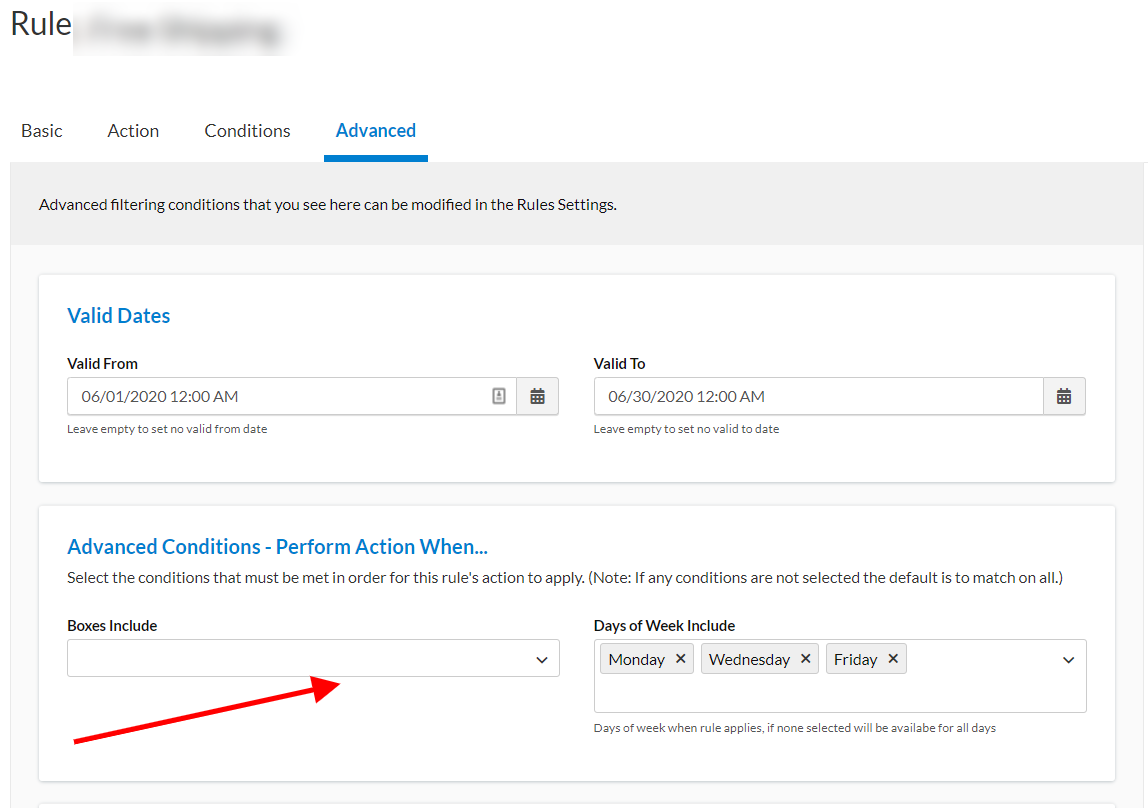
Review any box-based surcharges or discounts under the Shipping Rules tab:
- Go to Shipping Rules > edit the box-based Carrier Rule
- Open the Advanced panel
- Check the Boxes Include dropdown to ensure appropriate boxes are included
Surcharges and Discounts
Evaluate shipping rules for unintended surcharges or discounts. Adjust them as needed. Please see here for guidance on configuring and testing shipping rules.
Confirm Unit Consistency
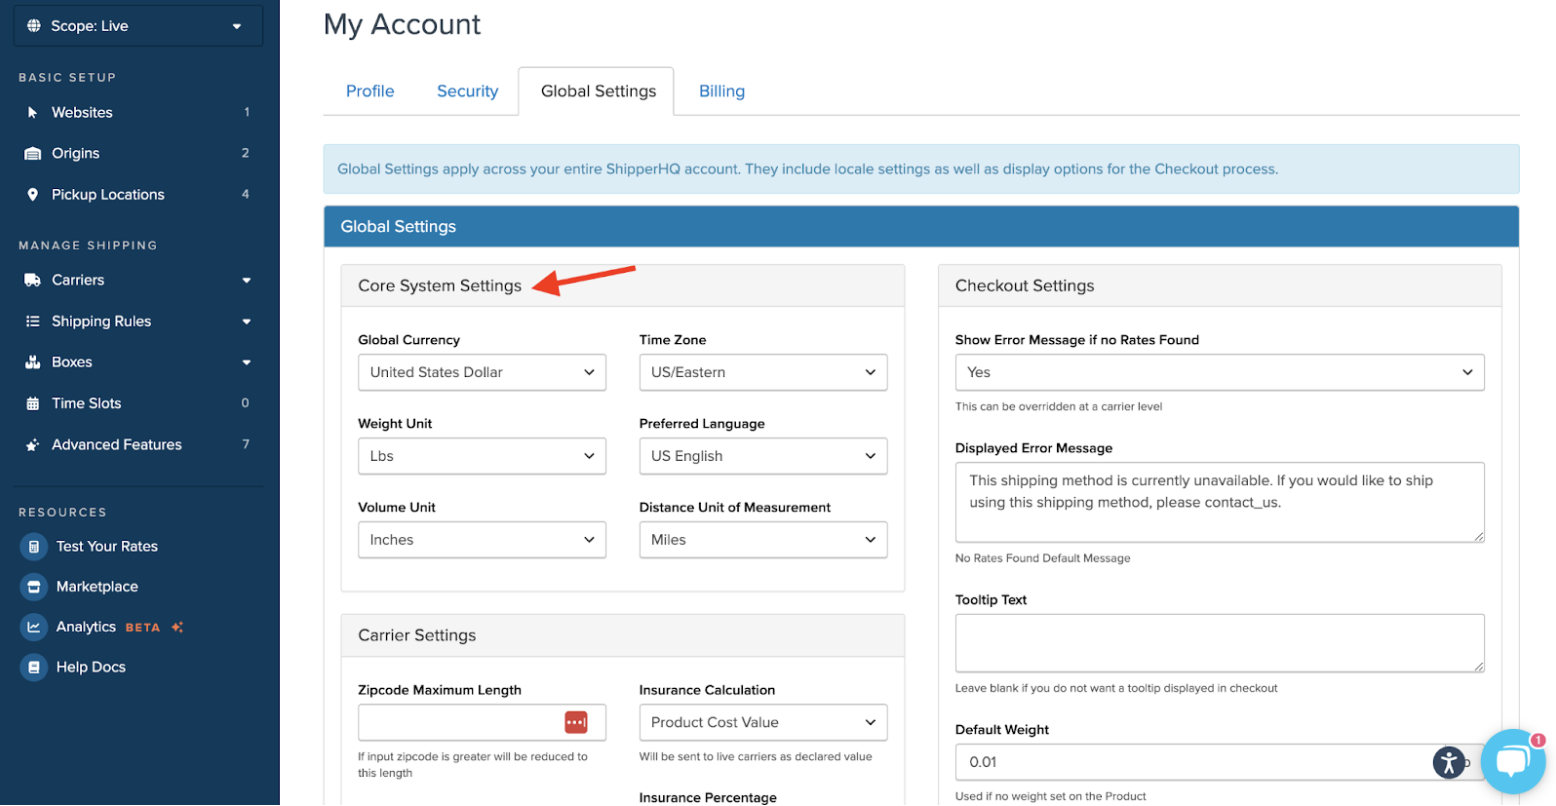
- Weight Units: Ensure consistency between ShipperHQ and your eCommerce platform. Check global settings for weights and measures in the Global Settings section.
Review Dimensions set on Product/Items
Confirm that all product dimension fields include values for Length, Width, and Height. ShipperHQ does not interpret partial or incomplete dimensions sent from your eCommerce platform. If any dimension is missing, ShipperHQ removes all dimensions from the rate request and defaults to using only the product weight.Analyze Store Logs
Examine store logs for rate calculation insights. Logs can reveal discrepancies and configuration issues. Find steps to locate your store logs here.
Contact Support if Needed
If issues persist after following these steps, collect the following and contact ShipperHQ support:
- Transaction ID/Quote ID: Found in your store's logs.
- Carrier Rate Comparison: Replicate the carrier's quote online and screenshot the results.
- Include shipping information, origin and destination addresses, number of packages, and dimensions.
- ShipperHQ Test Results: Use the Test Your Rates feature and capture full address, cart details, and transaction ID.
Providing this information helps support efficiently diagnose and resolve issues.
By covering these areas, you can often correct common causes of shipping rate discrepancies and ensure reliable shipping calculations for your customers.