Overview
ShipperHQ offers a handy Test Your Rates calculator 😊. This tool is perfect for occasions when you adjust your configuration, want to understand an order's packaging better, or find a rate that seems off.
Table of Contents- Overview
- How to Test Your Rates
- Enter Address Fields
- Enter Example Cart Products
- Example Testing Scenario
- Related Articles
How to Test Your Rates
Access the "Test Your Rates" calculator in the ShipperHQ dashboard's left-hand navigation.
When you open the calculator, you will see two sections where you can input information for the order you wish to test.
Enter Address Fields
- In the Shipping Destination section, specify the country, state/region, and zip/postal code.
- Click Enter Full Address to expand the section and add street information as well.
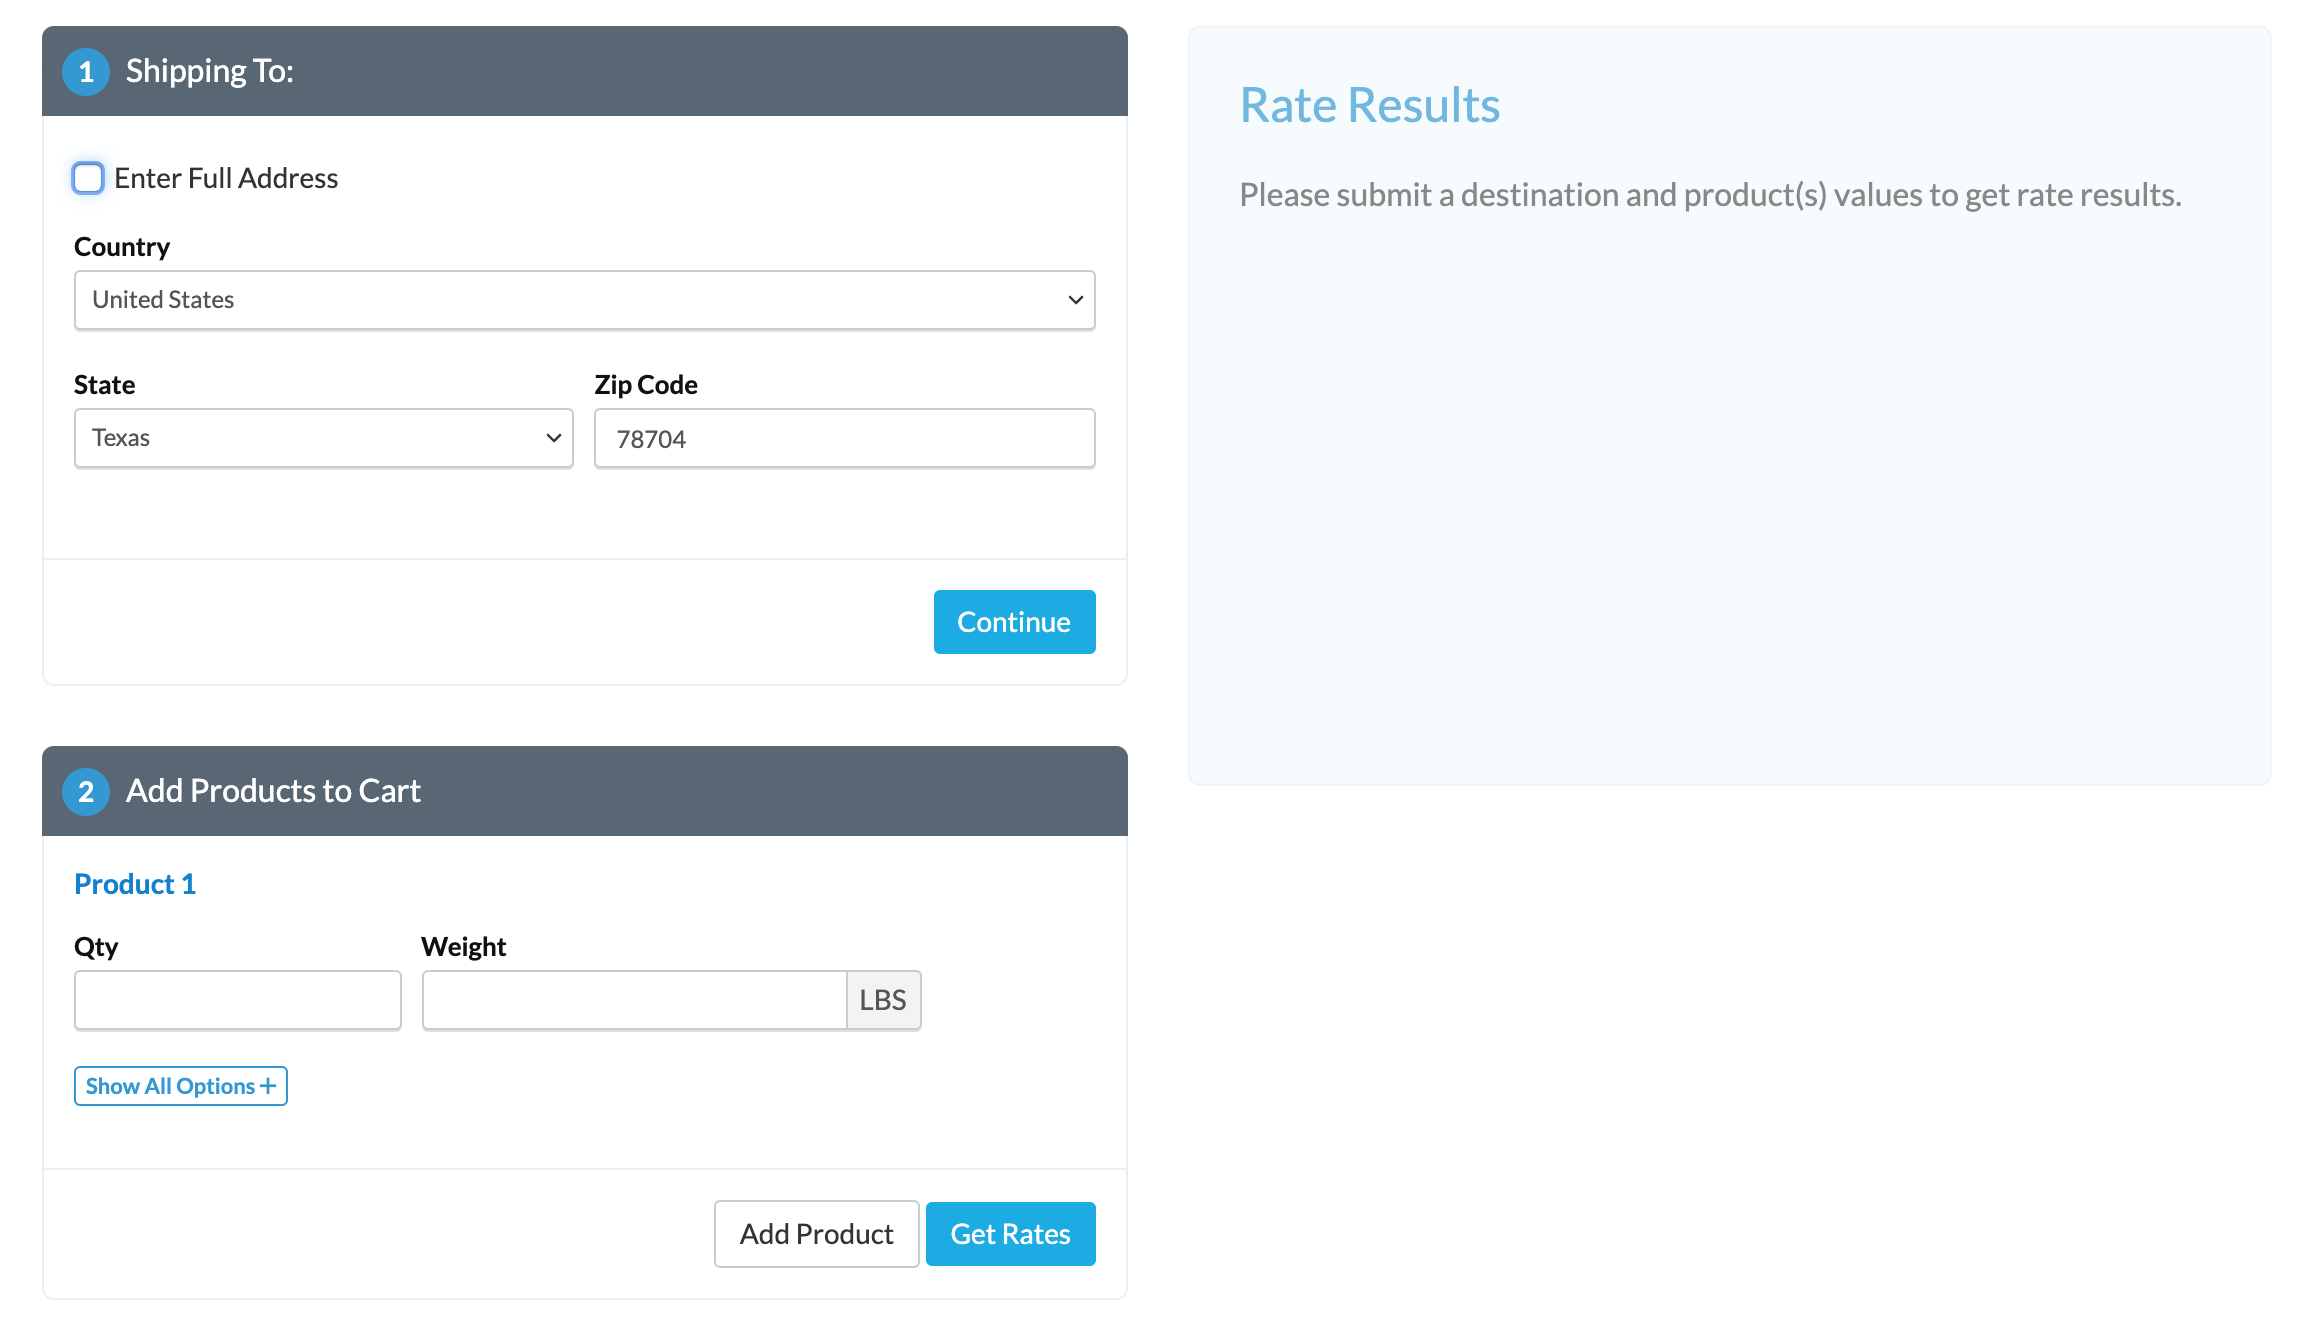
Enter Example Cart Products
- In the "Cart" section, add a basic dummy product(s) by specifying a quantity and adding the cart's weight.
- Click Get Rates to generate rates based on the details entered.
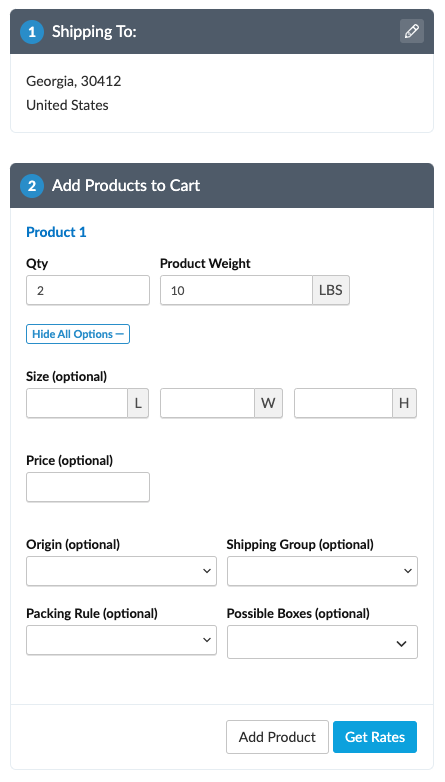
- For detailed testing, click Show All Options + within the "Cart" section. This reveals fields for dimensions, price, origin, shipping group, packing rule, and potential shipping boxes. Use these to replicate an item exactly as it appears in your store. This is beneficial for testing shipping rules, packing rules, and shipping group restrictions to ensure the shipping logic functions correctly. It’s also a useful tool for checking for rate discrepancies.
💡 Please note: If you modify your configuration between tests, adjust the request slightly (e.g., add 0.001 to a product's weight) to avoid cached shipping rates.
Example Testing Scenario
Let’s explore advanced testing after expanding options:
- We created a shipping rule that offers free shipping via FedEx Ground when an item from the "Small" shipping group is in the cart.
- We assigned a packing rule to pack the item into a 2x4x4 box.
- In the relevant fields, add the "Small" shipping group and the "Box 2 Rule" packing rule:
💡 Missing Possible Boxes: If a box is missing in the "Possible Boxes" dropdown, it's because the setting "Can be used to pack all products" is checked. ShipperHQ excludes that box from specific product assignments for this reason.
- After entering the necessary information, click "Get Rates" for results.
As expected, our order receives free FedEx Ground Shipping, packed into "Box 2":
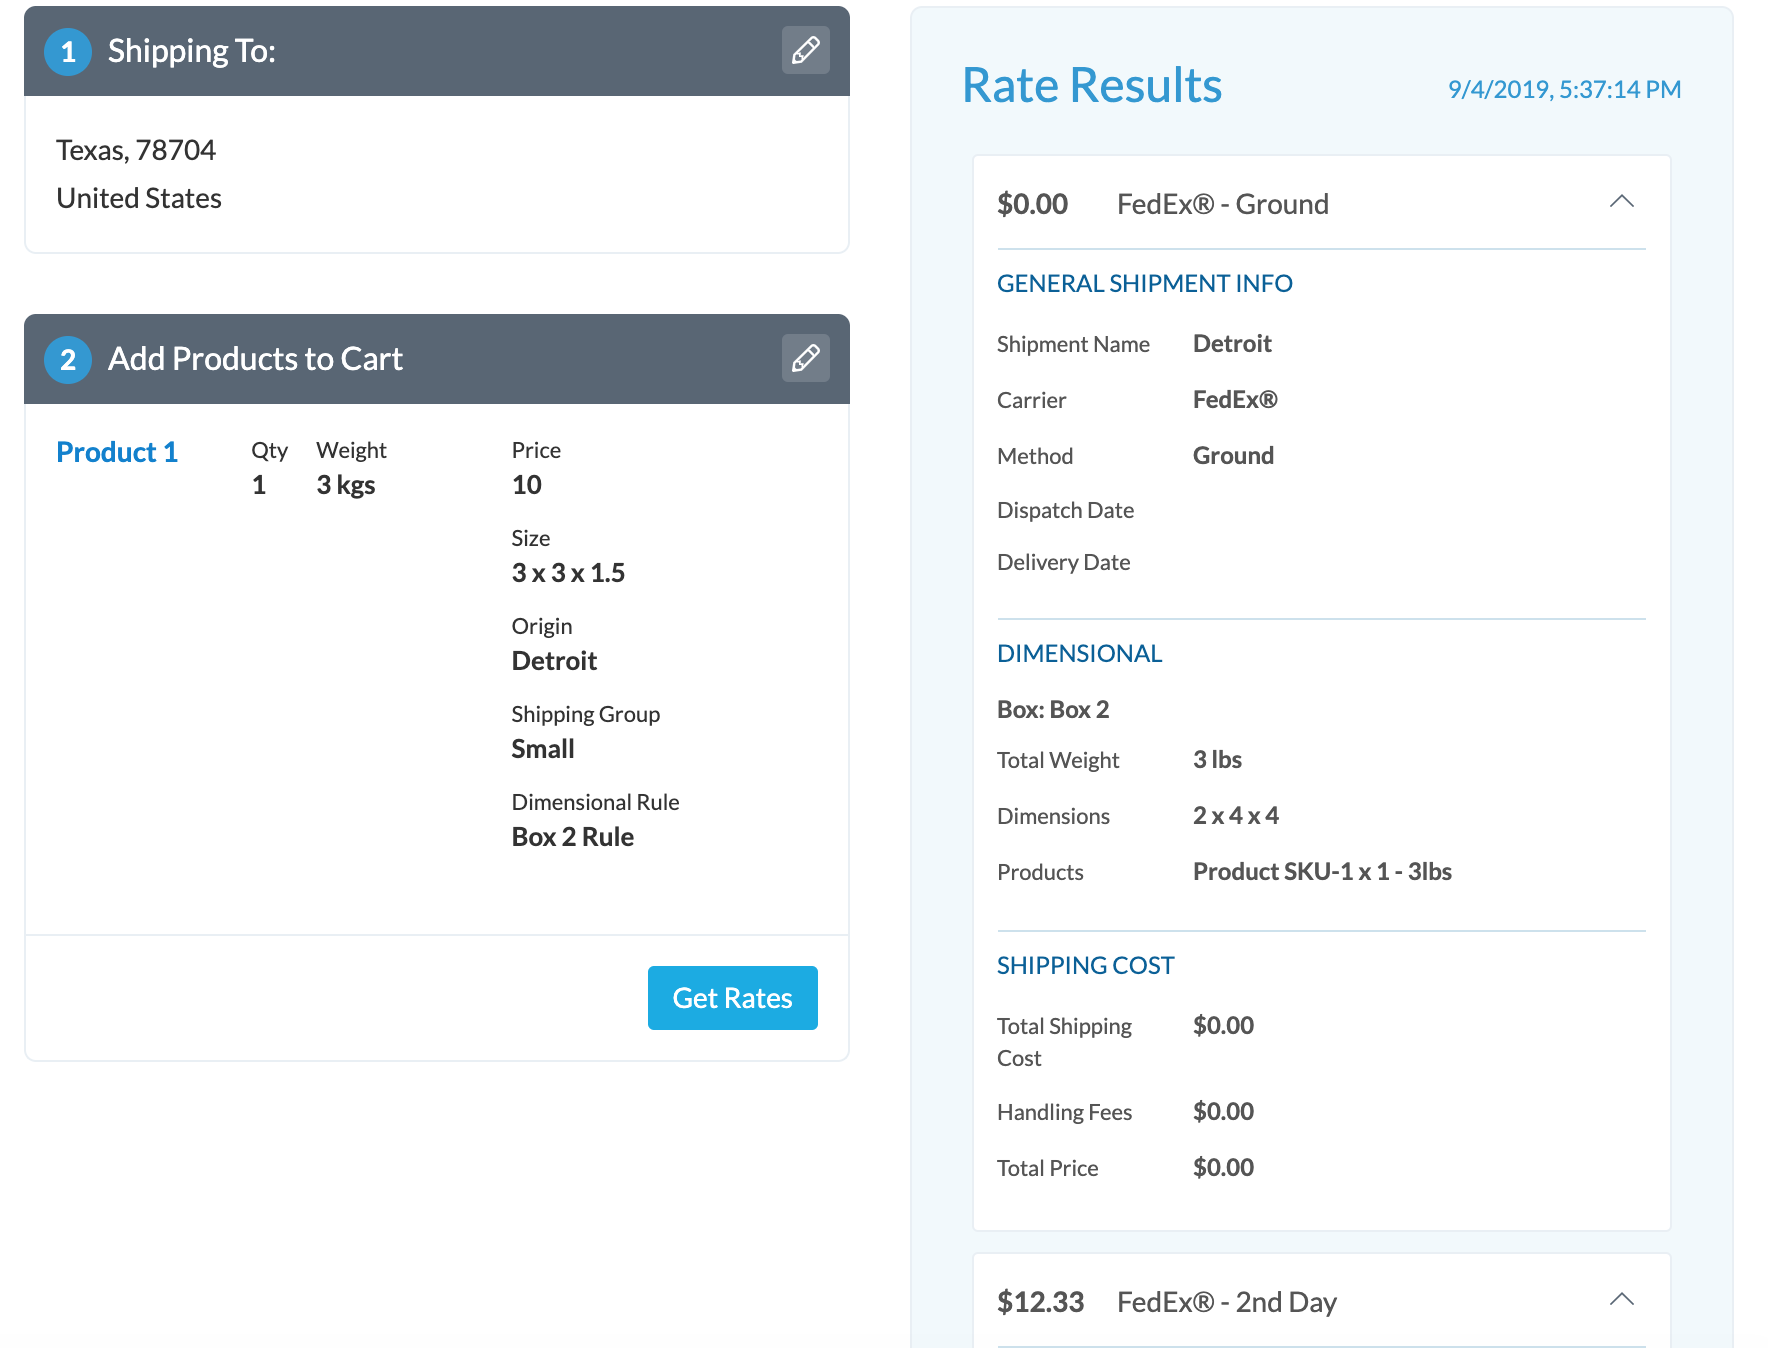
If results aren't as expected, something in ShipperHQ might not be set up correctly. The rate calculator results can help identify the issue.