- Overview
- Getting The Extension
- Latest Version
- Video Walkthrough
- Main Installation Process
- Setup
- Other Installation Processes
- Manually Enabling/Disabling Modules
- Migrating from Magento 1 to Magento 2
- Troubleshooting
- Post-Installation Steps
Overview
This is the comprehensive guide to installing or upgrading your ShipperHQ on Magento 1. If you're working with Magento 2, please see these instructions. Note that the steps have adjusted slightly for SHQ version 2.181, affecting installs or upgrades of v2.181 or newer. Carefully follow these steps to avoid any issues. Once installed, you can proceed with the configuration of the extension within Magento. 😊
Getting The Extension
You can download the latest ShipperHQ extension for Magento 1 from the public repository.
Latest Version
Keep up with the latest versions by watching the public repository.
Video Walkthrough
Main Installation Process
💡 If you're running a version of Magento other than the latest, check the Magento Version Compatibility chart to ensure it's compatible with ShipperHQ.
⚠️ Before enabling ShipperHQ, uninstall any shipping rating extensions you have, including WebShopApps extensions. For more, see how to disable WebShopApps extensions, or learn how to leave these extensions enabled while installing ShipperHQ.
⚠️ Backup your server files and database before installation. We recommend initially installing on a test server for your own testing.
- Switch off the Magento Compiler under System → Tools → Compilation
- Ensure Cache is enabled in Admin under System → Cache Management
- Extract the Zip archives
- Copy app directory contents (except "etc") from the Zip into your Magento base directory
- Copy contents of other directories (e.g., "lib", "skin") into their respective directories
- Copy "app/etc" directory last to ensure SQL runs correctly
- Log out and back into admin
- Disable cache in admin
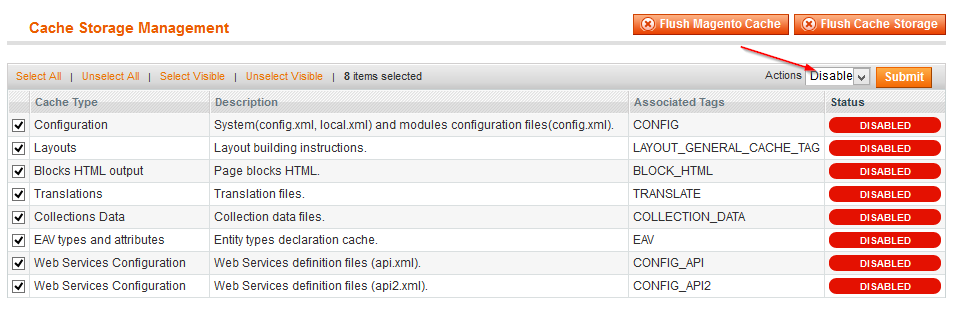
- Flush the Magento cache in cache management or manually remove
/var/cacheandvar/session - Open frontend to ensure SQL updates within the extension are performed
- If using the compiler, recompile via System → Tools → Compilation
You should now see your extension in the relevant backend area. ✅
- Re-enable cache in admin and refresh
Setup
By default, all modules are enabled. Unused modules will be disabled when you use the synchronize feature. 📌
New or Recent Customers (Upgrading from SHQ > 2.181)
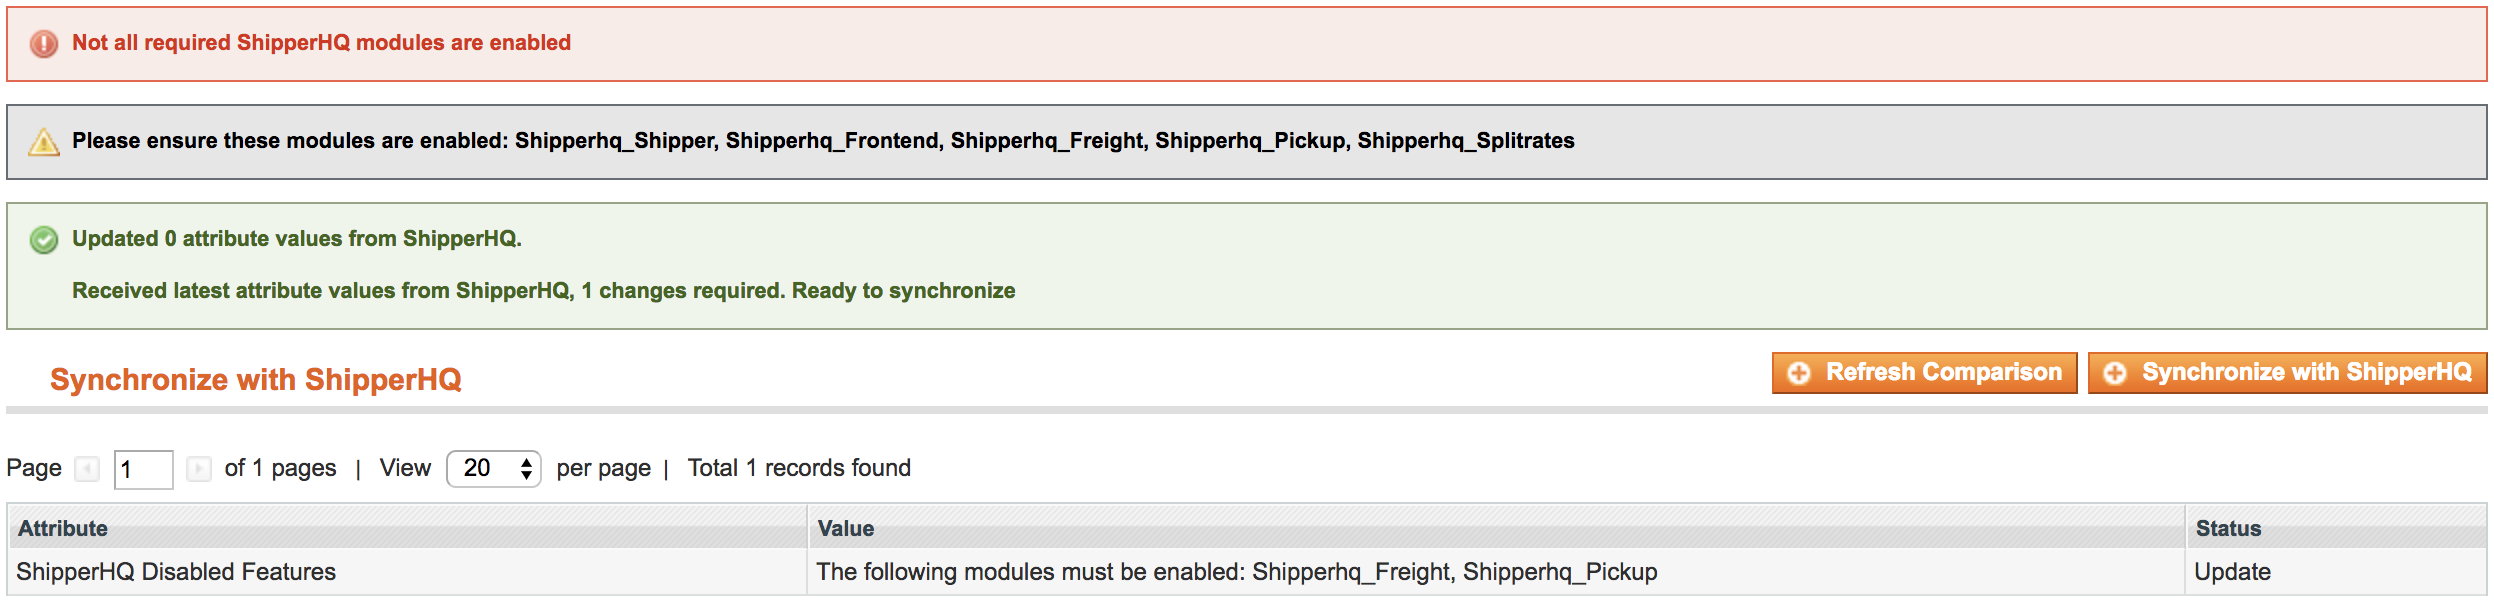
On new installs, modules adjust upon SHQ synchronization. Synchronizing should show:
- Features to be disabled:

- After synchronization:

- Log showing changes when the SHQ dashboard changes
- Example of enabling features:

Older Returning Customers (Upgrading from SHQ < 2.181)
For customers upgrading from an earlier version, the Disable Unused Modules feature is turned off, and should be manually checked. Features can be enabled manually:
- Under Config → Shipping Methods → ShipperHQ, the Disable Unused Modules feature is off by default for upgrades.

- On the Sync page, see the list of modules to be manually adjusted.
- If customizations are present, check whether they depend on extra modules.
Ensure no dependencies before enabling Disable Unused Modules.
Other Installation Processes
Manually Enabling/Disabling Modules
If Disable Unused Modules is off, Synchronize lists the modules for manual adjustment:
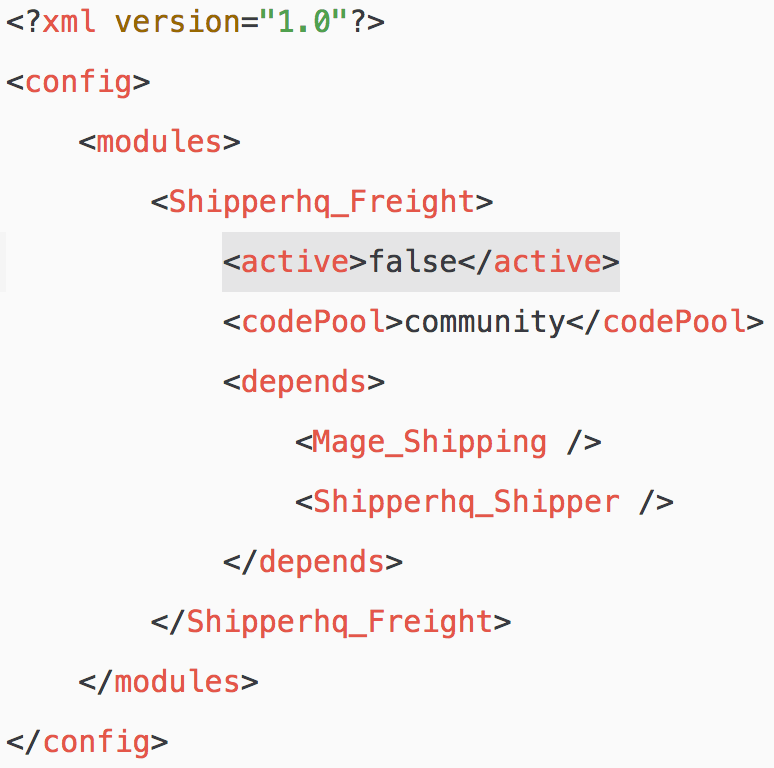
- Change the app/etc/modules/MODULENAME.xml file. Inside the file, update
<active>true/false</active>accordingly.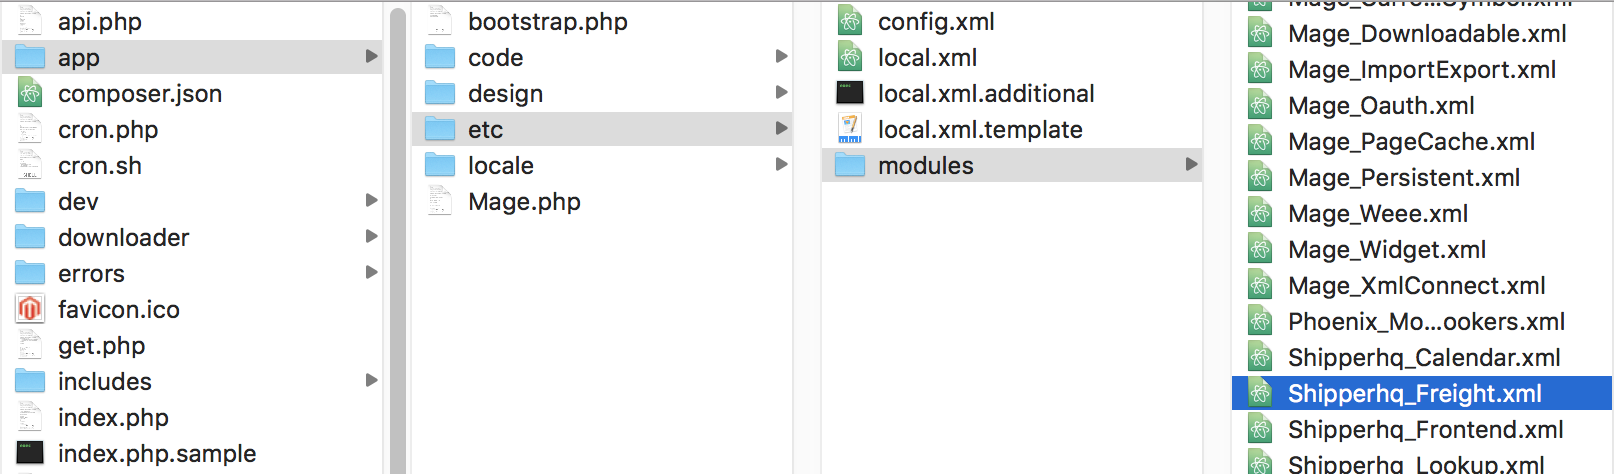
- Refresh Configuration Cache

Migrating from Magento 1 to Magento 2
For migration from Magento 1 to Magento 2, follow additional steps as files differ. Learn more here.
Troubleshooting
-
"HALP! I ran synchronize and my site broke!!!!!"

- Refresh caches If broken, customization expects a turned-off feature. Re-enable them manually and disable the Disable Unused Modules.
- Can't identify the module? Enable all for safety.
-
"I ran Synchronize and got a missing modules error!"
- Ensure Disable Unused Modules can be turned on If already enabled but error persists, something blocks sync. Turn off the feature and follow manual instructions.
Post-Installation Steps
To successfully connect your Magento site to ShipperHQ, configure your website in ShipperHQ. Finally, configure the ShipperHQ Magento extension.