Overview
The ShipperHQ Magento 2 extension comes with the comprehensive ShipperHQ Logger. This enables you to inspect the workings of the extension, and if necessary, provide ShipperHQ logs when raising support calls. This doc explains how to enable the ShipperHQ logger and find Transaction IDs.
Key Features
The logger gives you the following capabilities:
- Dedicated log panel within admin, no need to open log files
- Ability to set logging level to show more/less logs
- Log to admin, file system and/or via email
Additionally we have added the following functionality:
- Runs asynchronously, reducing impact on performance to a minimum
- Ability to switch off when in production, will not affect performance at all
- Periodic Cron job which clears out WebShopApps extension related logs from the database
Configuration
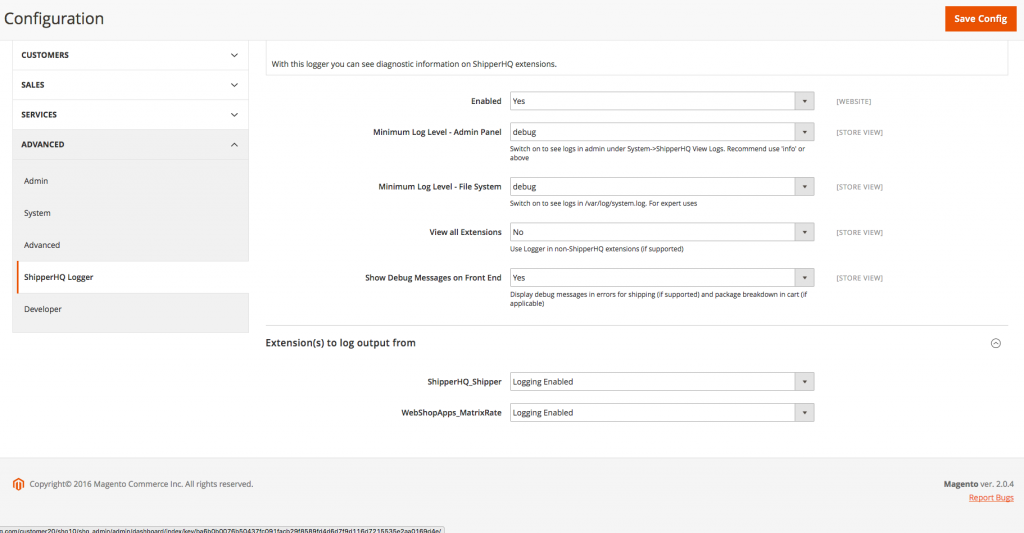
The Logger is configured under Stores -> Configuration -> Advanced -> ShipperHQ Logger. You’ll want to flip Enabled to ‘Yes’.
Before you configure logging please consider how you wish to use it. Answer the following:
- Do I want to log to the admin panel, the system log, or send each log via email?
- What level of logging do I need?
The sections below will help you answer each of these questions. Once you have changed your configuration then you will need to re-exercise the ShipperHQ extension code on the frontend in order to get logs to appear. For shipping extensions this means by getting a shipping quote in cart or checkout.
Where Should I Log To?
In the configuration you can select where to output logs to, and at
A. via Admin Panel
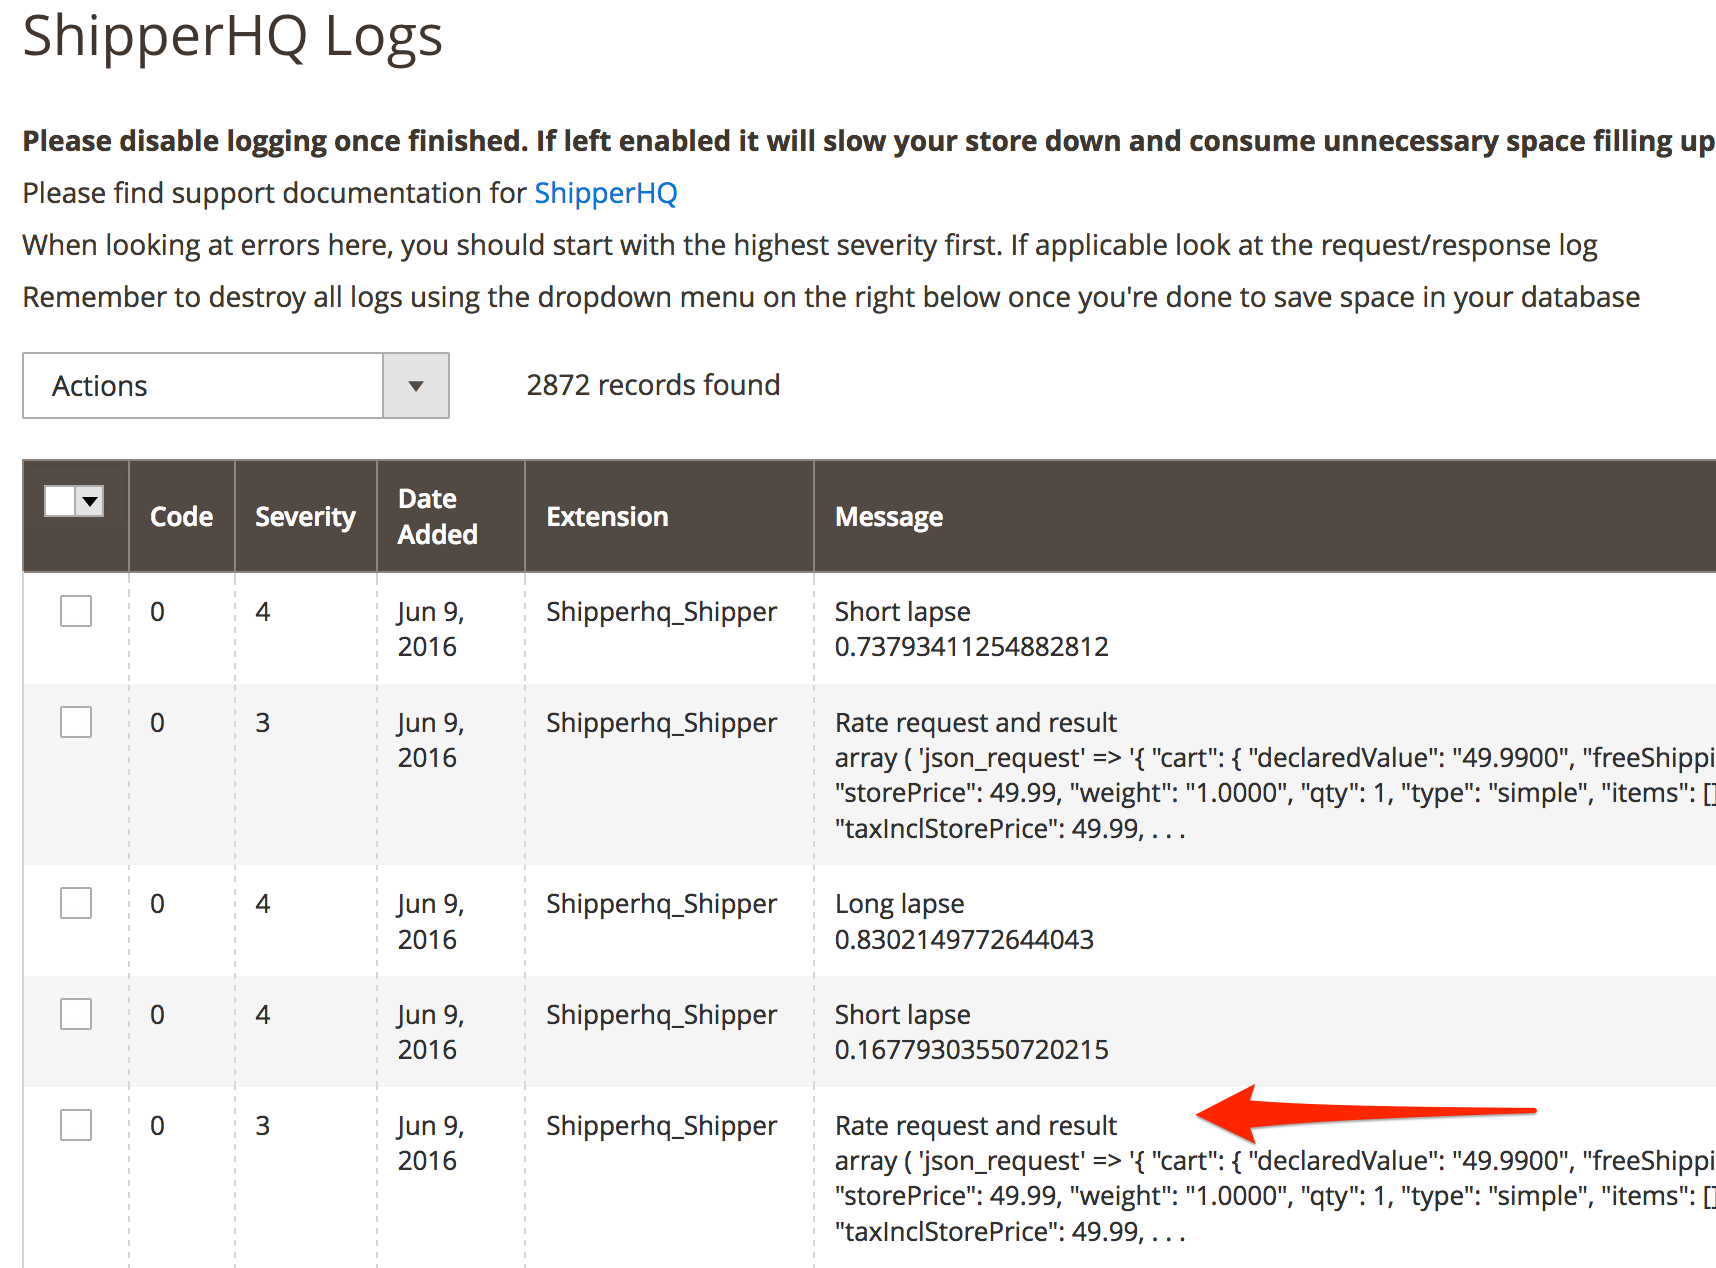
For most customers logging to the admin panel will suffice. Logs will by shown under System -> ShipperHQ View Log
An example output will be a grid of logs. Depending on the log level set you will see more/less logs. If you do not see logs please firstly refresh the page, then check you have exercised the relevant extension, have set Debug to Yes on the shipping method configuration page and have configuration setup correctly for the Logger.
You have the ability to filter, sort, and display extra information on each row in the log. We highly recommend if you are testing that before you run a test you select all logs and then click ‘Destroy all logs’ to remove them. This will ensure the logs make most sense, as they will then only relate to last test.
B. via File System
We also support output direct to the file system under /var/log/system.log. You will need to have developer logging enabled to use this facility. This is recommended only for advanced users.
What level of logging do I need?
There are 4 levels of logging you can choose, choosing one will include all levels above it, i.e. if you choose debug then info, warning, critical will also be captured.
| Level | Description | Recommended for |
|---|---|---|
| Critical | Displays critical issues such as unable to process data | Useful in testing, set to log to email and receive notifications of any issues found. Don’t see this as a replacement for actual manual testing though! |
| Warning | Displays warning messages, e.g. a rate cannot be found for this zipcode | Useful to highlight any issues in testing |
| Info | Gives high level informational messages in a format that can be understood | When you want useful information on the working of the extension |
| Debug | In depth technical information on an extension | Expert users only, much of information will not make sense, this is primarily used by WebShopApps to see debugging. You may be asked to create debug logs to send to WebShopApps so we can see your configuration setup |
Reviewing Product Data
When the Logger is enabled each rating request will generate a log that provides full details of the cart that is sent to ShipperHQ.
- Request a shipping rate for the cart that you are investigating
- Navigate to System > ShipperHQ View Logs
- Open the entry titled “Rate Request and Result:

- Under “Message” will be the full details of the cart, including the details of each item:
"cart": {
    "declaredValue": 32,
    "freeShipping": false,
    "items": [
        {
            "id": "13",
            "sku": "24-MB04",
            "qty": 1,
            "weight": "1.0000",
            "rowTotal": 32,
            "basePrice": 32,
            "storePrice": 32,
            "taxInclBasePrice": 32,
            "taxInclStorePrice": 32,
            "baseRowTotal": 32,
            "discountPercent": 0,
            "discountedBasePrice": 32,
            "discountedStorePrice": 32,
            "discountedTaxInclBasePrice": 32,
            "discountedTaxInclStorePrice": 32,
            "fixedPrice": false,
            "fixedWeight": false,
            "discountAmount": 0,
            "attributes": [
                {
                    "name": "ship_length",
                    "value": "6.0000"
                },
                {
                    "name": "ship_height",
                    "value": "8.0000"
                },
                {
                    "name": "ship_width",
                    "value": "4.0000"
                },
                {
                    "name": "shipperhq_shipping_group",
                    "value": "Bikes"
                }
            ],
            "baseCurrency": "USD",
            "packageCurrency": "USD",
            "storeBaseCurrency": "USD",
            "storeCurrentCurrency": "USD",
            "taxPercentage": 0,
            "freeShipping": false,
            "type": "simple",
            "items": [],
            "additionalAttributes": [],
            "warehouseDetails": [],
            "pickupLocationDetails": [],
            "defaultWarehouseStockDetail": {
                "inventoryCount": 100,
                "availabilityDate": null,
                "inStock": true
            }
        }
    ]
},
"destination": {
    "country": "US",
    "region": "CA",
    "city": "Los Angeles",
    "street": "25 Tester",
    "street2": null,
    "zipcode": "90034",
    "accessorials": null,
    "selectedOptions": {
        "options": []
    },
    "email": null,
    "givenName": null,
    "familyName": null,
    "telNo": null
},
"customerDetails": {
    "customerGroup": "NOT LOGGED IN"
},
"cartType": "STD",
"deliveryDateUTC": null,
"deliveryDate": null,
"carrierId": null,
"carrierGroupId": null,
"shipDetails": null,
"carrierCode": null,
"validateAddress": true,
"credentials": {
    "password": null,
    "apiKey": "REDACTED"
},
"siteDetails": {
    "ecommerceCart": "Magento 2 Community",
    "ecommerceVersion": "2.3.2",
    "websiteUrl": "http:\\/\\/www.localhost.com\\/",
    "environmentScope": "TEST",
    "appVersion": "20.34.2",
    "ipAddress": "127.0.0.1"
}
The most common section to review is the “attributes” as this details the attributes read from that product. If any attributes are not present please see the Attributes Not Included in Request article.
Locating Transaction IDs
The Transaction ID is used by our support team to get into the issues faster. By providing this, along with your support email we can start looking into the problem much faster.
In Magento 2, you can extract the transaction ID from within the order details, or by using the ShipperHQ Logger via the Admin Panel (enabled by following the steps detailed above). To find the transaction ID:
Finding the Transaction ID from within the Order Details
- Navigate within your Magento Dashboard to Sales > Orders
- Select the order you wish to locate the Transaction ID for
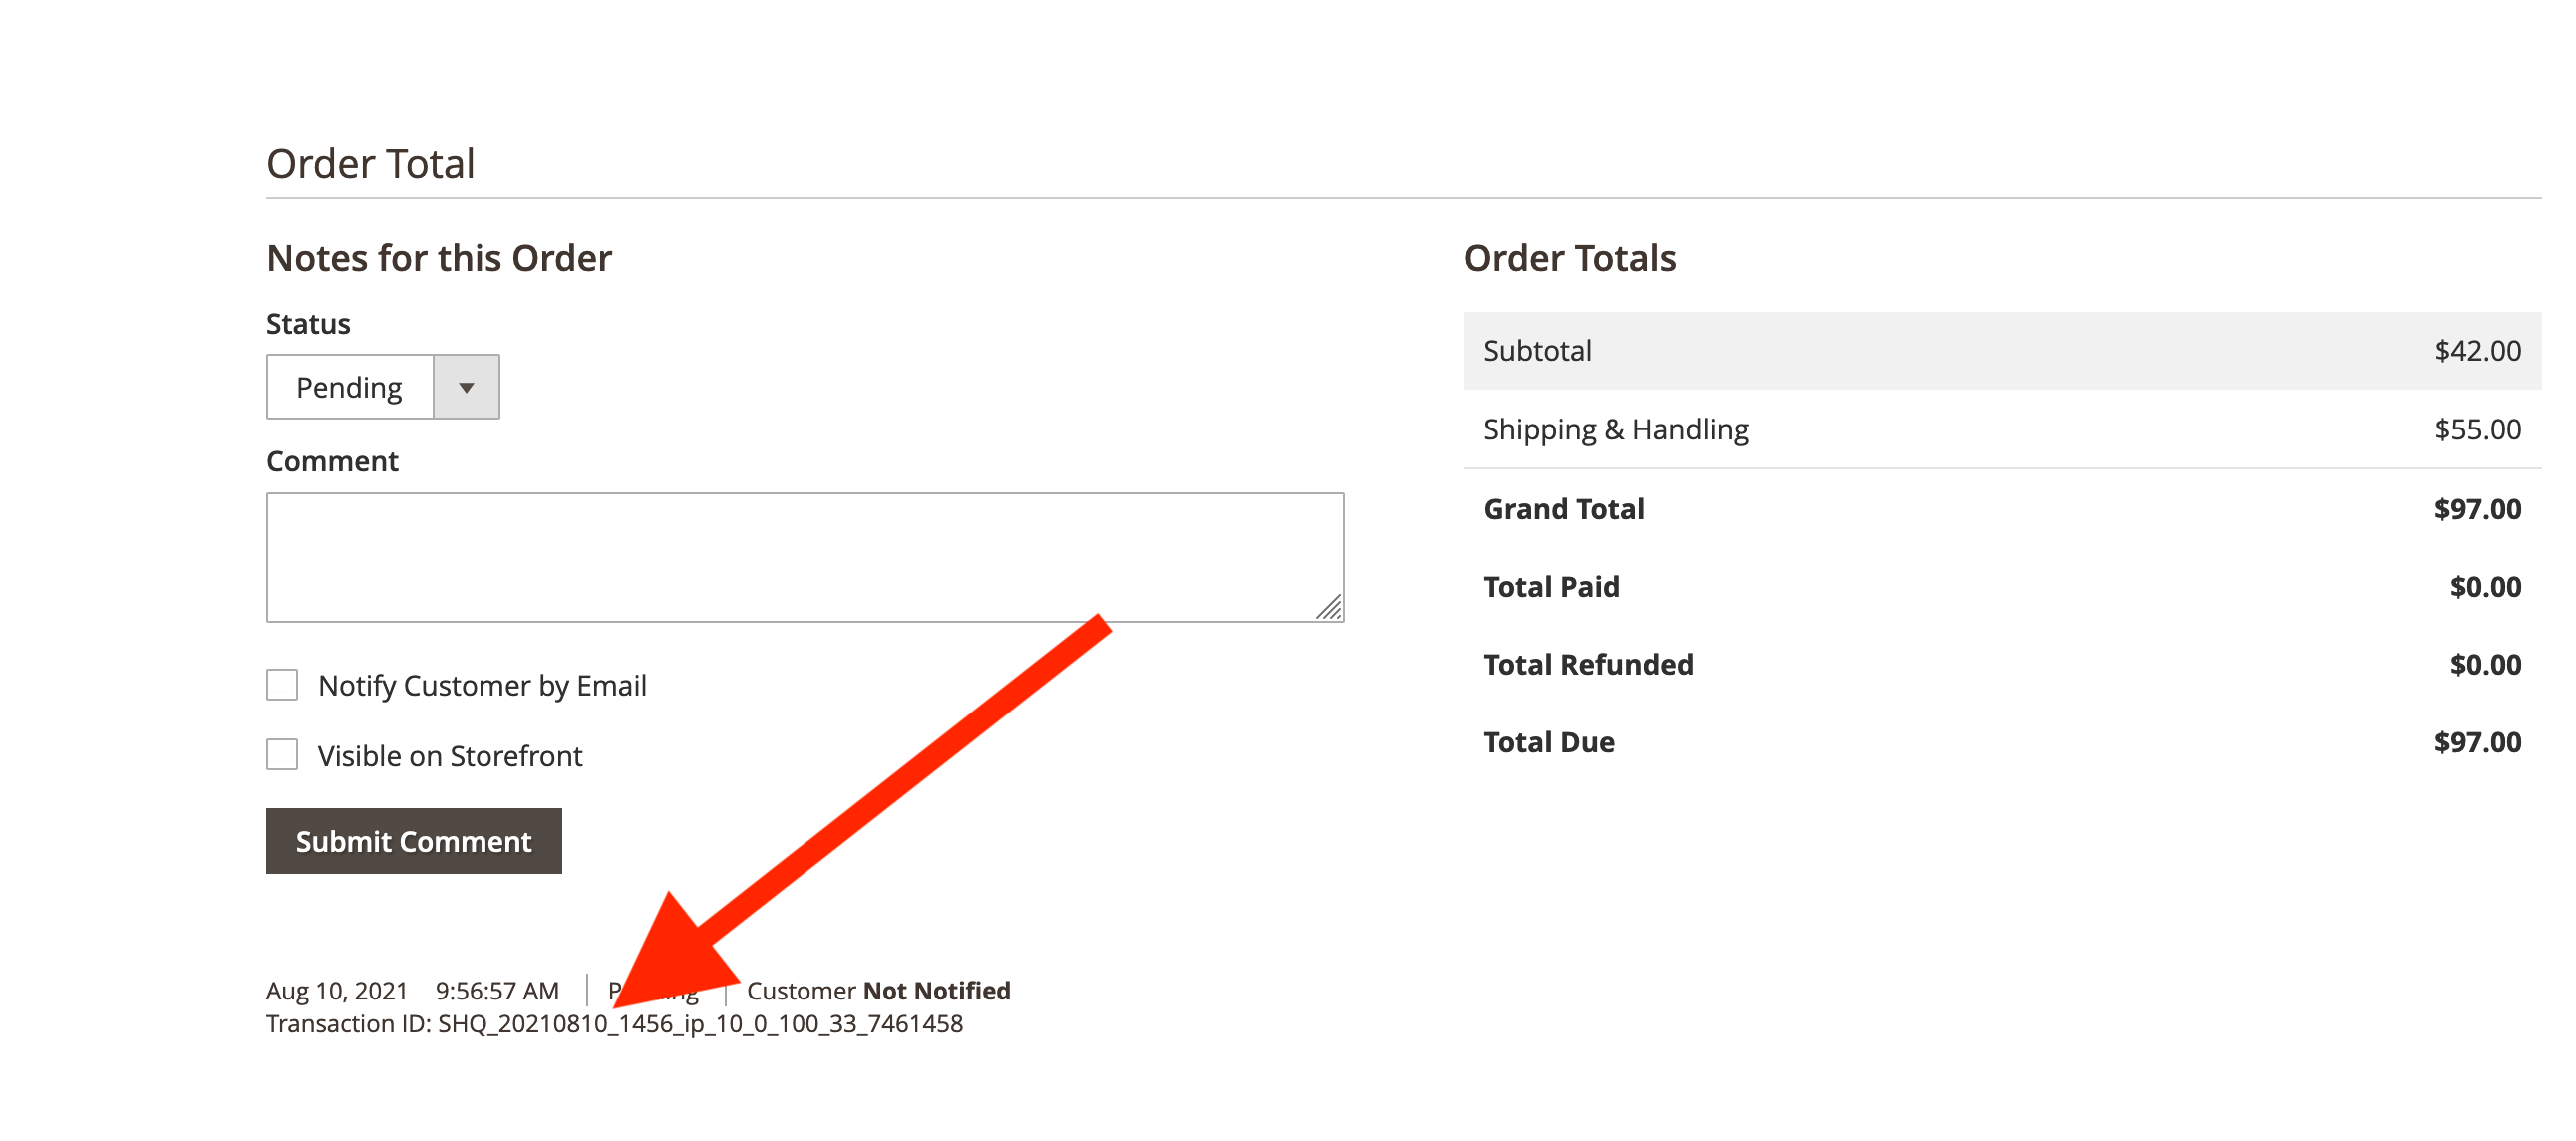
- Within the order, scroll down the page and under the order comments you’ll locate the the Transaction ID
(These ID’s are prefixed with “SHQ_” and look like “SHQ_20210810_1456_ip_10_0_100_33_7461458”)
Finding the Transaction ID within the ShipperHQ View logs
- Perform the request or test that you are investigating
- Go to System > ShipperHQ View Logs
- Open the entry titled “Rate Request and Result”

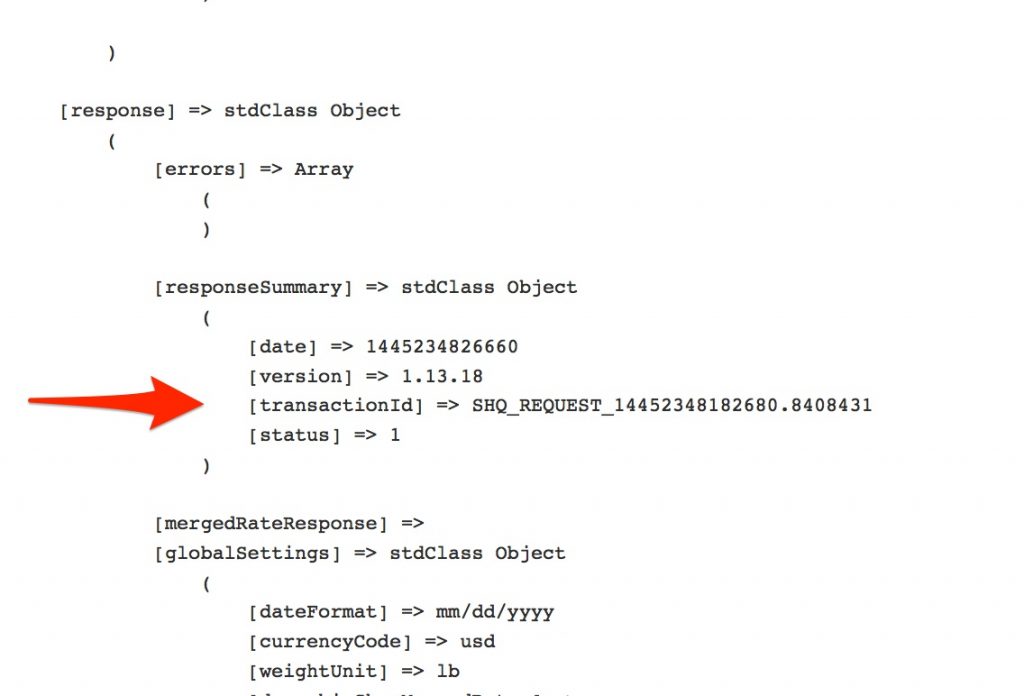
- Scroll down until you see the field transactionId, within the response. Use cmd-f (if mac), or ctrl-f on others. Then type “transaction” and the Transaction ID is found.

- Copy this number, along with a description of the problem you’re having to the support team so they can begin to diagnose the issue.
- Once you have this information, remember to disable the ShipperHQ logger as per steps 2 and 3 and set Debug = No as per step 7
ShipperHQ methods into Magento
You can view the code of the carriers, alongside methods associated with each carrier from within the logger in Magento. All of these details are logged and can be accessed by going to System > ShipperHQ View Logger and then clicking on “Allowed Methods.” From there, you’ll see the JSON response that contains all of the SHQ defined carriers codes along with the method names and their associated codes. Please note that you need to synchronize before you can see any of this information. See example screenshot.
Please remember to turn the logger off, it does not need to be constantly running. If left running it will slow down your shipping rates exponentially.


