- Overview
- Requirements
- Delivery Dates or Time in Transit
- Calendar
- Supported Carriers
- Setup Feature
- Feature Settings
- Origins
- Carrier Configuration
- Max Number of Days to Show
- Show Cheapest Delivery Date
- Table Rate Carriers
- Additional Info on Functionality
Overview
😊 Clear delivery dates and expectations at checkout are key aspects of shipping transparency by setting customer expectations upfront. ShipperHQ's Delivery Date & Time Advanced Feature enhances the shipping info shown to customers at checkout, allowing you to show:
- Delivery Dates (e.g., Fri, July 10)
- Time in Transit (e.g., 3 days)
- A calendar for selecting the delivery date and time (available on certain eCommerce platforms)
Requirements
Delivery Dates or Time in Transit
Displaying Delivery Dates or Time in Transit is supported on all eCommerce platforms
Calendar
Different eCommerce platforms have different requirements for displaying a delivery date selector calendar.
Magento 1 and Zoey
Calendar is available on the standard ShipperHQ extension for Magento 1 and app for Zoey with a ShipperHQ Standard plan and up.
Magento 2 and Adobe Commerce
There are two options for displaying a calendar on Magento 2 or Adobe Commerce. With Enhanced Checkout and a ShipperHQ Enterprise plan, or with the standard ShipperHQ extension and a ShipperHQ Standard plan or higher.
💡 Requires Additional Module: With the standard extension, you'll need the shipperhq/module-calendar additional module. If using In-Store Pickup, shipperhq/module-pickup is also required.
BigCommerce
Calendar is available on the ShipperHQ Enterprise plan with Enhanced Checkout for BigCommerce.
Shopify
Calendar is available on the ShipperHQ Enterprise plan with Enhanced Checkout for Shopify.
Supported Carriers
We support these time/date options on the following carriers:
- Small Package Carriers: UPS, FedEx, FedEx Ground Economy, Canada Post, USPS
- Custom Carriers: Custom Table Rates, In-Store Pickup
- LTL Freight Carriers (Delivery Date only): TForce Freight, PITT OHIO
⚠️ Some limited date & time settings are also available for Same Day custom carriers.
Setup Feature
To enable these features:
- Under the Advanced Features tab in the left navigation, enable Delivery Date & Time from the menu (screenshot below)
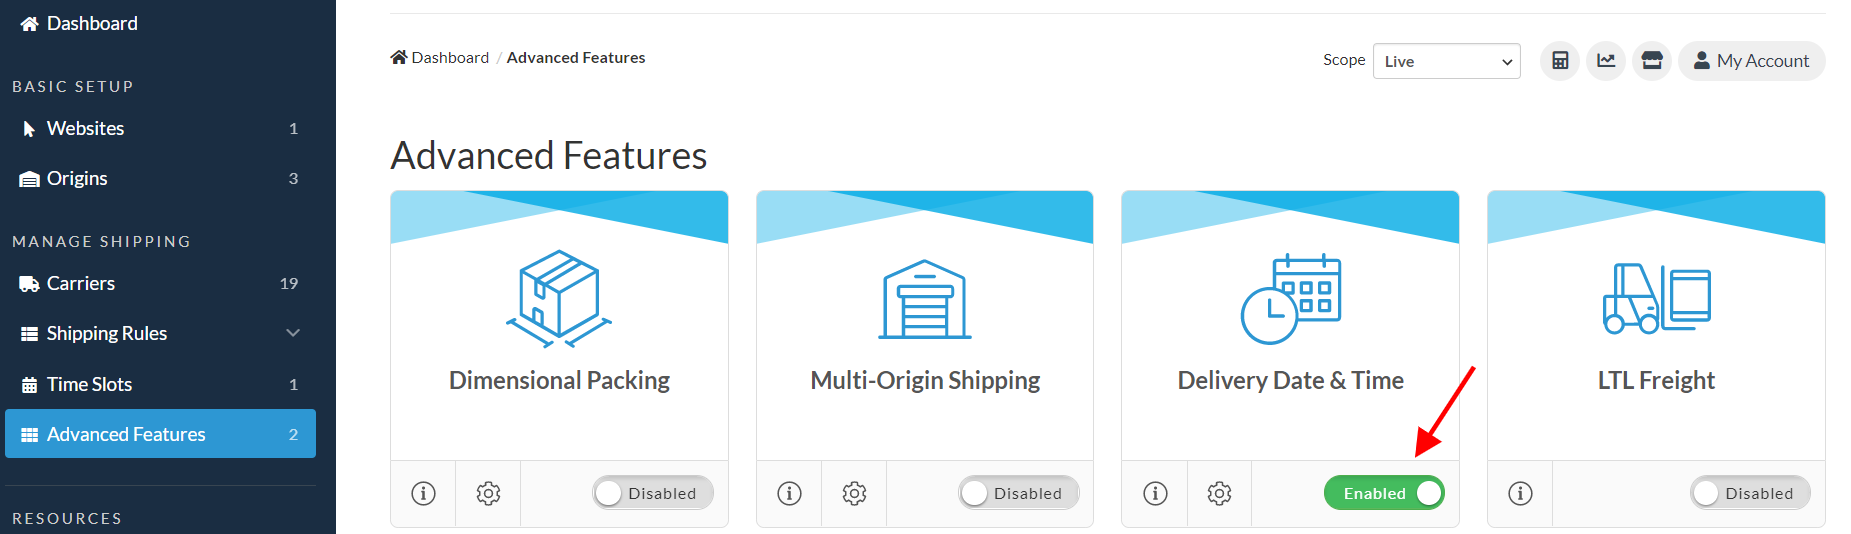
- Once enabled, you will see some feature settings if you click on the gear icon on that feature. To configure your Date & Time settings, go back to Carriers and see Carrier Configuration below.
Feature Settings
If you click on the Delivery Date & Time feature itself, you will see three settings options:

- Could not determine Delivery Date message: Set the message for undetermined delivery dates.
- Lead Time Overrides Cutoff Time: If set to yes, cutoff time is ignored if a Lead Time has been applied.
- Calendar Display Option: How the Calendar should display in Checkout (inline, or Popup). Only supported on Magento 1/2 and Zoey Platforms.
Origins
If you are using any form of time-in-transit capabilities, setting up the date-based information is necessary. ShipperHQ asks for details on:
- Blackout production days/dates: when your factory is not producing goods. Set to 0 if you can ship items straight away. A great example is a picture framer who needs five days to produce an order.
- Blackout shipment days/dates: when goods can be picked up for delivery.
- Cut-off time: the cut-off time for this origin to ship goods. Relevant if shipping on the same day.
Carrier Configuration
- Under the carrier, look for the Date & Time tab.
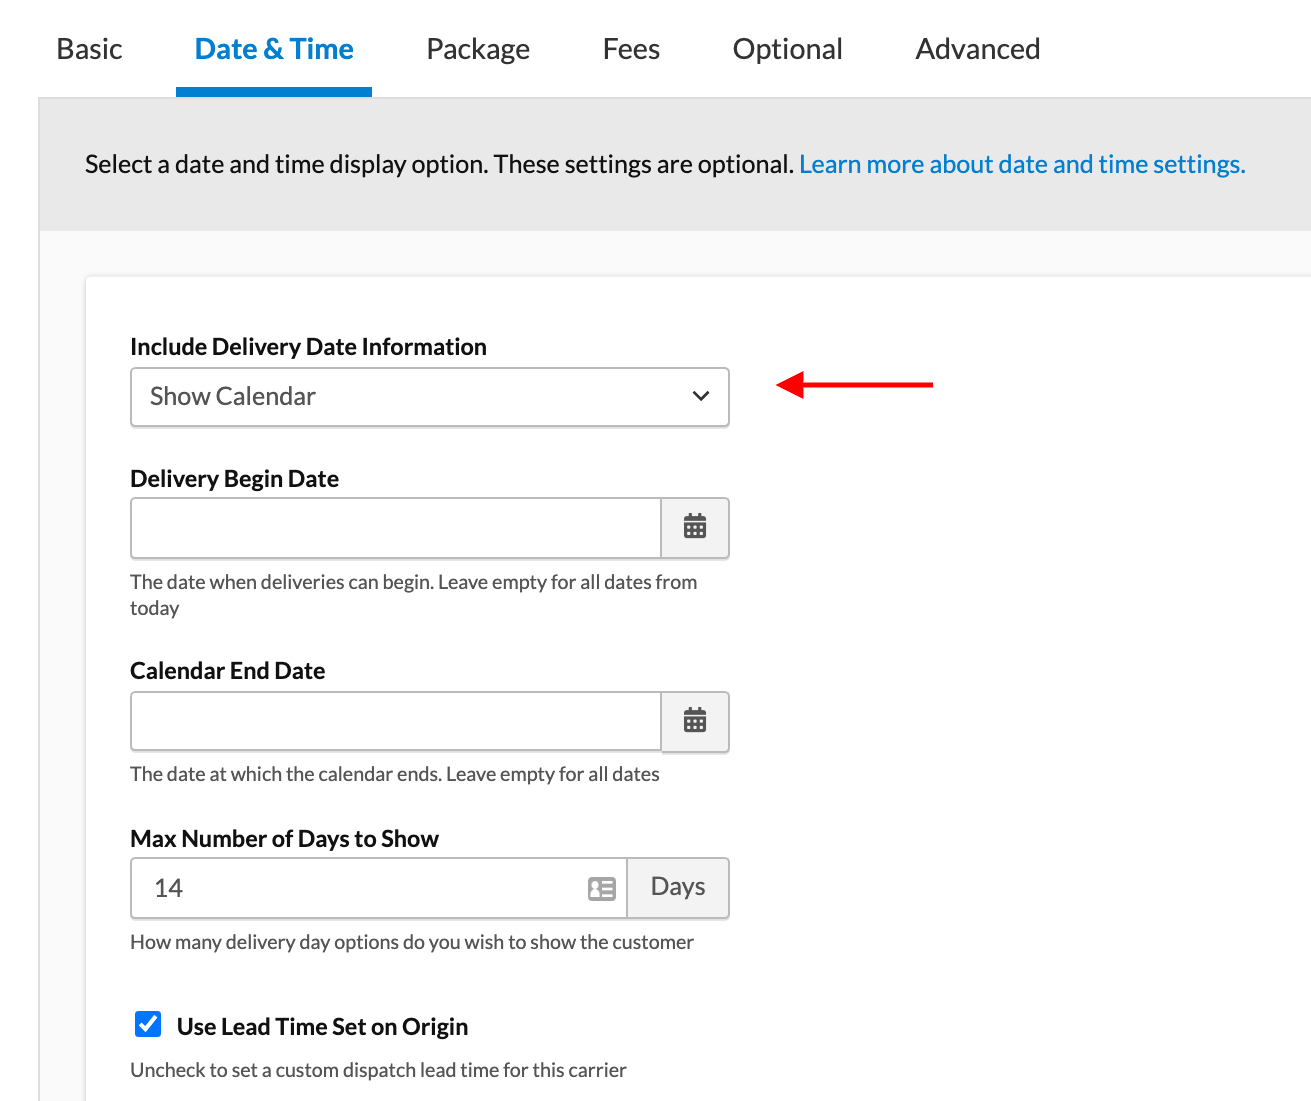
- Under Include Delivery Date Information, choose between displaying shipping rates only, Delivery Date, Time in Transit, or Show Calendar.
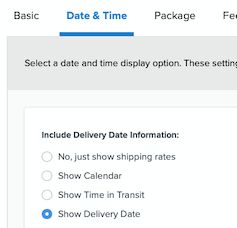
- a. When Delivery Date or Time in Transit are selected, update settings around Lead Times, Cut-off Times, or Blackout Dates.
b. When Show Calendar is selected, determine the start and end dates of the calendar for delivery day. You may also define available days for customer selection. By default, ShipperHQ uses the lead time of the product origin as the lead time for this carrier, but you can override that for this specific carrier, if necessary. You can also edit the blackout delivery dates for this carrier.
💡 Note: "Show Calendar" is not available on all eCommerce platforms. See Requirements for more info.
- Save the Carrier.
Now, your Live Rate Carrier will show Delivery Date or Time in Transit with the Shipping Rates and methods.
Delivery Date Message
The default delivery date message is "Delivers: month/day/year." The text "Delivers" can be changed under the "Display Options" within the Date and Time Settings:
Max Number of Days to Show
When you select “Show Calendar,” the field “Max Number Of Days to Show” will indicate how many days the customer can select post-dispatch. For instance, a 14-day value allows selection up to 14 days from tomorrow, the current dispatch date.
Show Cheapest Delivery Date
Cheapest Date with Calendar
When using the Calendar display option, there are two factors for displaying the Cheapest Date:
- Check "Default to Cheapest Delivery Date" to pre-select the calendar date with the cheapest available shipping rate, considering max time in transit and blackout delivery dates/days.
- Check "Show Cheapest Option per Delivery Date" to only display the cheapest shipping method per day, filtering out more expensive rates.
Cheapest Date with Delivery Date or Time in Transit
When using the Delivery Date or Time in Transit display options, selecting "Show Cheapest Option per Delivery Date" shows only the cheapest rate per day, filtering out more expensive rates.
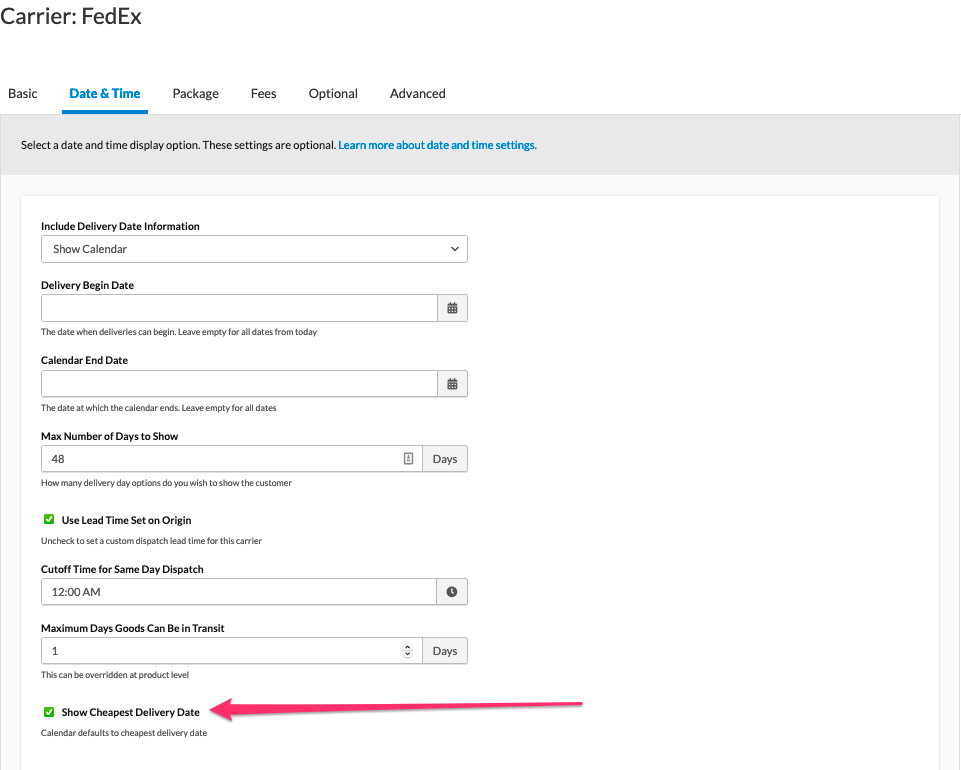
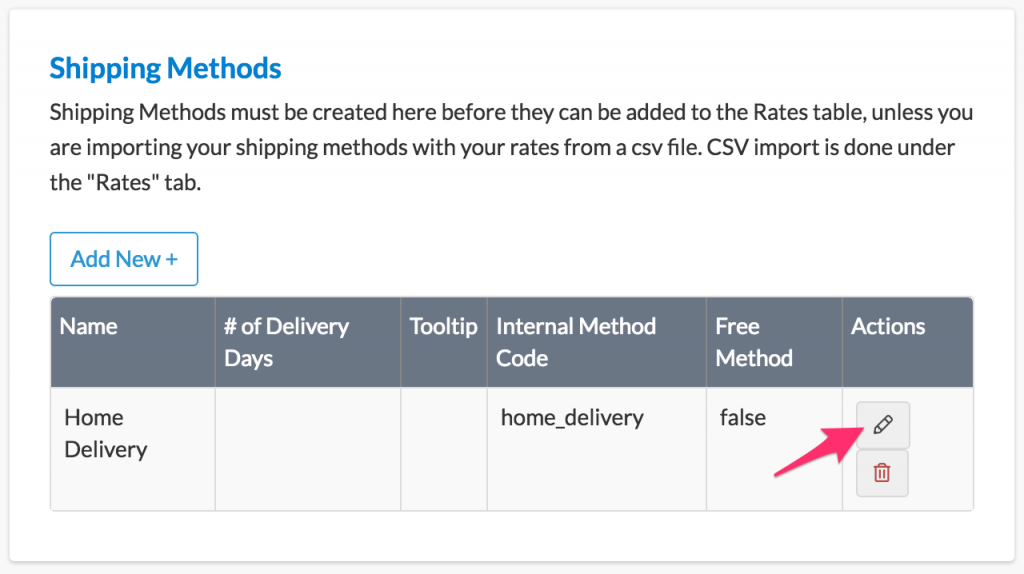
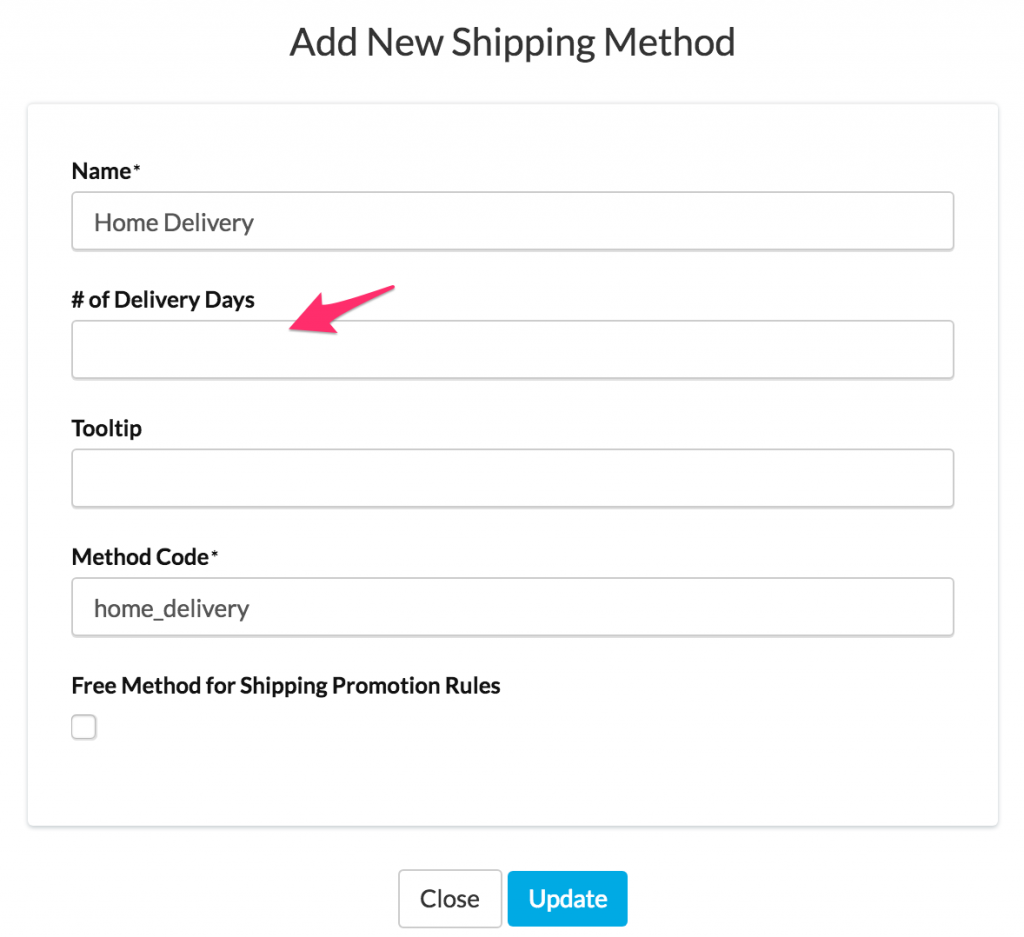
Table Rate Carriers
On Table Rate Carriers, set Lead Times for your custom shipping methods and additional Calendar Settings. Under the Basic tab, go to the Shipping Methods section and edit Methods to add Lead Times. These will affect the Delivery Date shown.
After setting lead times, Save the Carrier. This shows Delivery Date & Time against shipping methods. For more information on customizing the text displayed for your delivery dates and time in transit, read about our explanatory text on checkout.
Delivery Dates and Method Merging
When Method Merging is enabled, the delivery date shown on a merged rate comes from whichever contributing carrier has the longest (broadest) delivery window. If a carrier has no Delivery Date and Time settings configured, it is treated as having an unconstrained range, which makes it the default winner. For example, if FedEx is configured with a 1–2 day window and UPS has no range set, the merged rate will display UPS's unconstrained dates rather than FedEx's tighter estimate.
If any contributing carrier, within the Merged Rate or not, has no Delivery Date and Time configured, no delivery date will be shown at checkout, even if all other carriers in the merge are fully configured.
Note: If delivery dates are missing or inaccurate on a merged rate, confirm that every contributing carrier has Delivery Date and Time enabled. Then review each carrier's delivery window, the widest range will always take precedence.
Additional Info on Functionality
Read more about setting up Delivery Date & Time in ShipperHQ with these articles: