How to Assign ShipperHQ Product Attributes on BigCommerce
Set product-specific shipping attributes for accurate shipping calculations in BigCommerce
- Overview
- Product Setup in BigCommerce
- Individual Products
- Variant Products
- Bulk Import & Utilizing the API
- Shipping Fields
- Shipping Groups
- Origin Locations
- Packing Rules
- How-To Video
- Helpful Links
Overview
When you install the ShipperHQ BigCommerce App, you'll see additional shipping-related fields when editing your Products in BigCommerce. These fields help set up product-specific shipping information, such as the origins the products ship from, shipping groups, and any applicable packing rules. This guide walks you through these fields and when to use them.
Product Setup in BigCommerce
Individual Products
- In your BigCommerce Dashboard, go to Products and select "View".
- Select the product you wish to edit.
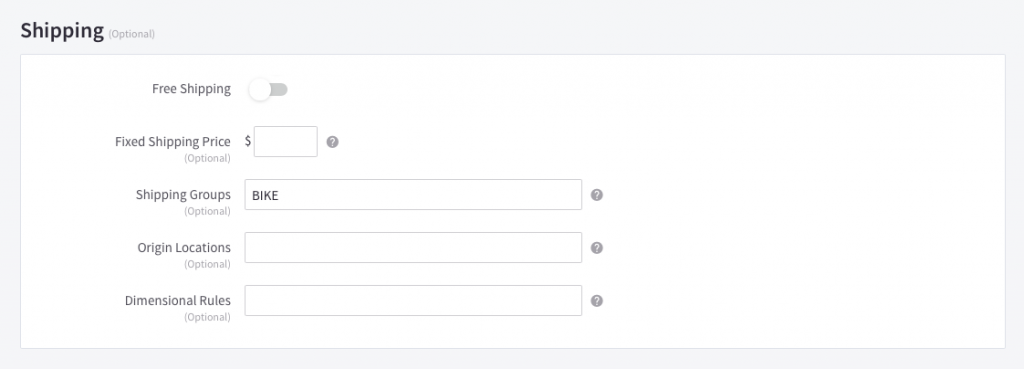
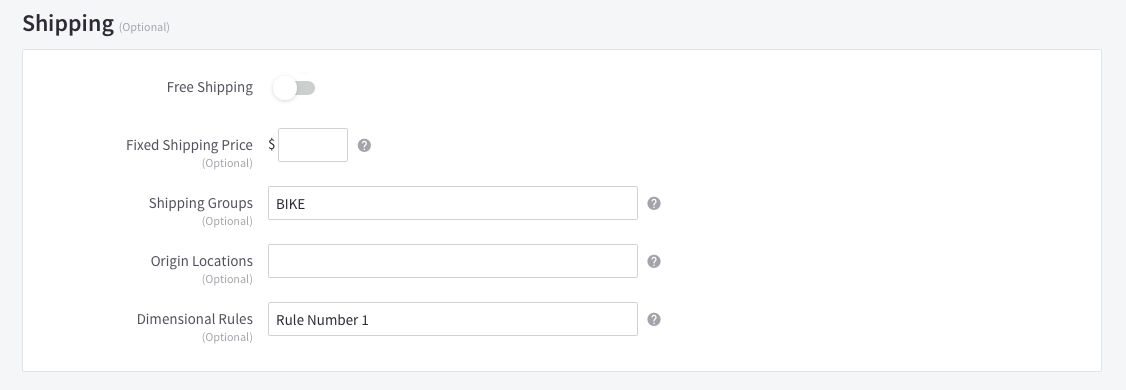
- Find the shipping-related fields in the "Shipping" section of your product details.
-
Copy/paste the exact name of your Shipping Group, Origin, or Packing Rule (Dimensional Rules) into the relevant field.
- Example: If you have a Shipping Group called "SURCHARGE", enter "SURCHARGE" in the Shipping Groups field.
- Note: Names are case sensitive. If you need to assign more than one Origin or Shipping Group to a product, separate the names with:
-
Note: Only one Packing Rule can be assigned in the DimensionalRules field. If an item is assigned multiple Packing Rules, ShipperHQ will not apply any packing rule to that item, which may affect how it’s packed and rated.
- Standard ShipperHQ: a comma
- ShipperHQ Plus: hash (#) symbol
 Shipping section on Products in BigCommerce. Shows: Shipping Group field, Origin field, Dimensional Rule field.
Variant Products
-
Edit the product in BigCommerce.
-
Navigate to the Variations section.
-
In the variants table, click the Edit Columns dropdown.
-
Select Shipping Groups from the list.
-
In the variants table, you’ll now see a Shipping Group column, enter the appropriate Shipping Group for each variant.
-
Ensure the Shipping Group name is an exact match, as it is case- and character-sensitive.
-
-
Save your changes.

💡 Note: You don't have to assign attributes to every product, only those for which you want a specific shipping rule. For instance, if you have just one origin, you can set that as the default, and no origin assignment is necessary.
Bulk Import & Utilizing the API
For updating multiple products, consider a bulk CSV import. BigCommerce provides guidance for exporting and importing product information by custom export templates. Test by creating a product manually and exporting it to see the format.
The BigCommerce API can also update product attributes more efficiently. Check out the robust API documentation available here:
💡 Note: If you enter values via a third party or API, wrap shipping group names with [\" and \"] when importing into BigCommerce. For example, import the "OVERSIZE" shipping group as [\"OVERSIZE\"]. Separate multiple shipping groups, e.g., "OVERSIZE" and "HAZMAT", with a comma like [\"OVERSIZE\",\"HAZMAT\"].
Shipping Fields
Shipping Groups
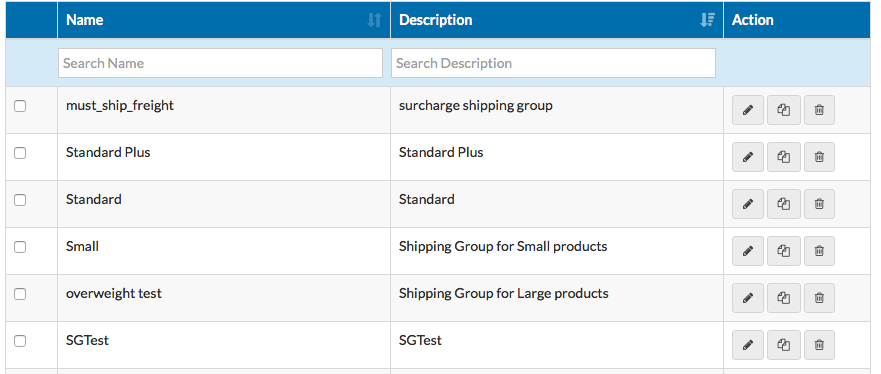
The Shipping Groups field lets you assign a product category for unique handling, such as perishable or bulky items. Create your Shipping Groups in ShipperHQ and enter the group name in the "Shipping Group" field on the product details.
 Shipping Groups in ShipperHQ
If all products share the same shipping rules, you won't need to use Shipping Groups. For products handled differently, leave this field empty on those that don't belong to a group to allow the default shipping configuration.
SKU-Based Shipping Groups
An SKU-based Shipping Group sets rules by product SKU code instead of a group in BigCommerce. Match the Shipping Group Name within the product SKU; for example, name a group “LARGESIZE” to match with "SM1-LARGESIZE." This setting is case-sensitive. Enable the "SKU Based Shipping Group" option in ShipperHQ's Advanced tab for this purpose.
HS Codes
HS codes support duties and tax calculations for international shipping or when using the ShipperHQ Duties & Taxes. Set HS Codes in BigCommerce with the Shipping Group attribute using "^HS:" followed by the code, like "^HS:22.18.93". Combine with standard Shipping Groups similarly by separating values with:
- Standard ShipperHQ: a comma
, - ShipperHQ Plus: hash (#) symbol
Example:
- Standard ShipperHQ: For "LARGE" Shipping Group with HS Code 53.41.87, use "LARGE,^HS:53.41.87".
- ShipperHQ Plus: Use "LARGE#^HS:53.41.87".
Origin Locations
Specify the origins from which a product can be shipped. Define these in ShipperHQ and enter the names here. If shipping from a single origin, leave this field blank for default use.
 Origins in ShipperHQ
Packing Rules
Set up specific Packing Rules in ShipperHQ to handle certain products differently during dimension calculation, such as items shipped separately. Enter the Rule Name in the Dimensional Rules field.
 Packing Rules in ShipperHQ
Defining Master Packing Boxes
In scenarios using a Master Packing box, define boxes in the same area as packing rules. If already defining a packing rule, it will override any master packing box.

How-To Video
🚀 Check out our instructional video for a visual guide on assigning ShipperHQ attributes to your products.