Overview
This article explains the requirements and steps to take to set up UPS Access Point® in ShipperHQ. Other UPS services are also supported on ShipperHQ but are set up separately.
If you’re looking to offer Ship to a UPS Access Point Location as an option for your customers, you can do this at no cost with a free ShipperHQ Plan supporting UPS Access Point. This free offering supports only basic display options. More information is available on our Promotions & Savings page.Need access to the full set of powerful ShipperHQ features supporting UPS services? As a UPS Ready provider, ShipperHQ is pleased to be eligible for payment under UPS Digital Connections. More information is available on our UPS Ready page.
In addition to UPS Access Point, ShipperHQ supports an extensive set of UPS services including domestic and international small package.
What is UPS Ship to Access Point?
UPS Access Point® carrier provides an alternate delivery address to send your customer’s packages to a UPS Access Point® location. Your customers can collect them when it suits their schedule. Locations are hand-selected based on reliability, locale and ease of experience. Customers will be offered a choice of UPS Access Point® location(s) closest to them based on their delivery address.
UPS Access Point® service allows you, the merchant, to limit which type of location is offered as a potential delivery location. For example, you can limit options to only those locations that can accept restricted goods e.g. wine. You can also limit locations based on the business type, for example, if you sell cakes you may wish to exclude bakeries as potential pick up locations.
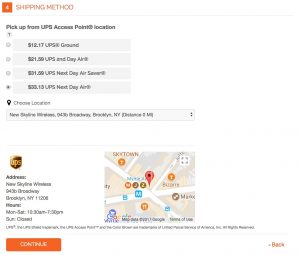
ShipperHQ supports UPS Access Point® carrier with rich functionality on the checkout for Magento 1 and 2, allowing customers to select a pick-up location and optionally display a map of the nearest locations.
Note: You do not need to enable the “Delivery Date & Time” Advanced Feature in order to use UPS Access Point®.
For Magento 2
In order to display a map at checkout, you will have to have the In-Store Pickup Advanced Feature enabled within ShipperHQ and module-pickup to be installed in your Magento admin. The base extension (module-shipper) doesn’t support the map display on it’s own. You will need to email support@shipperhq.com and ask for access to private satis repository for ShipperHQ’s module-pickup package.
For customers using Shopify and Big Commerce, we provide a specific set of features.
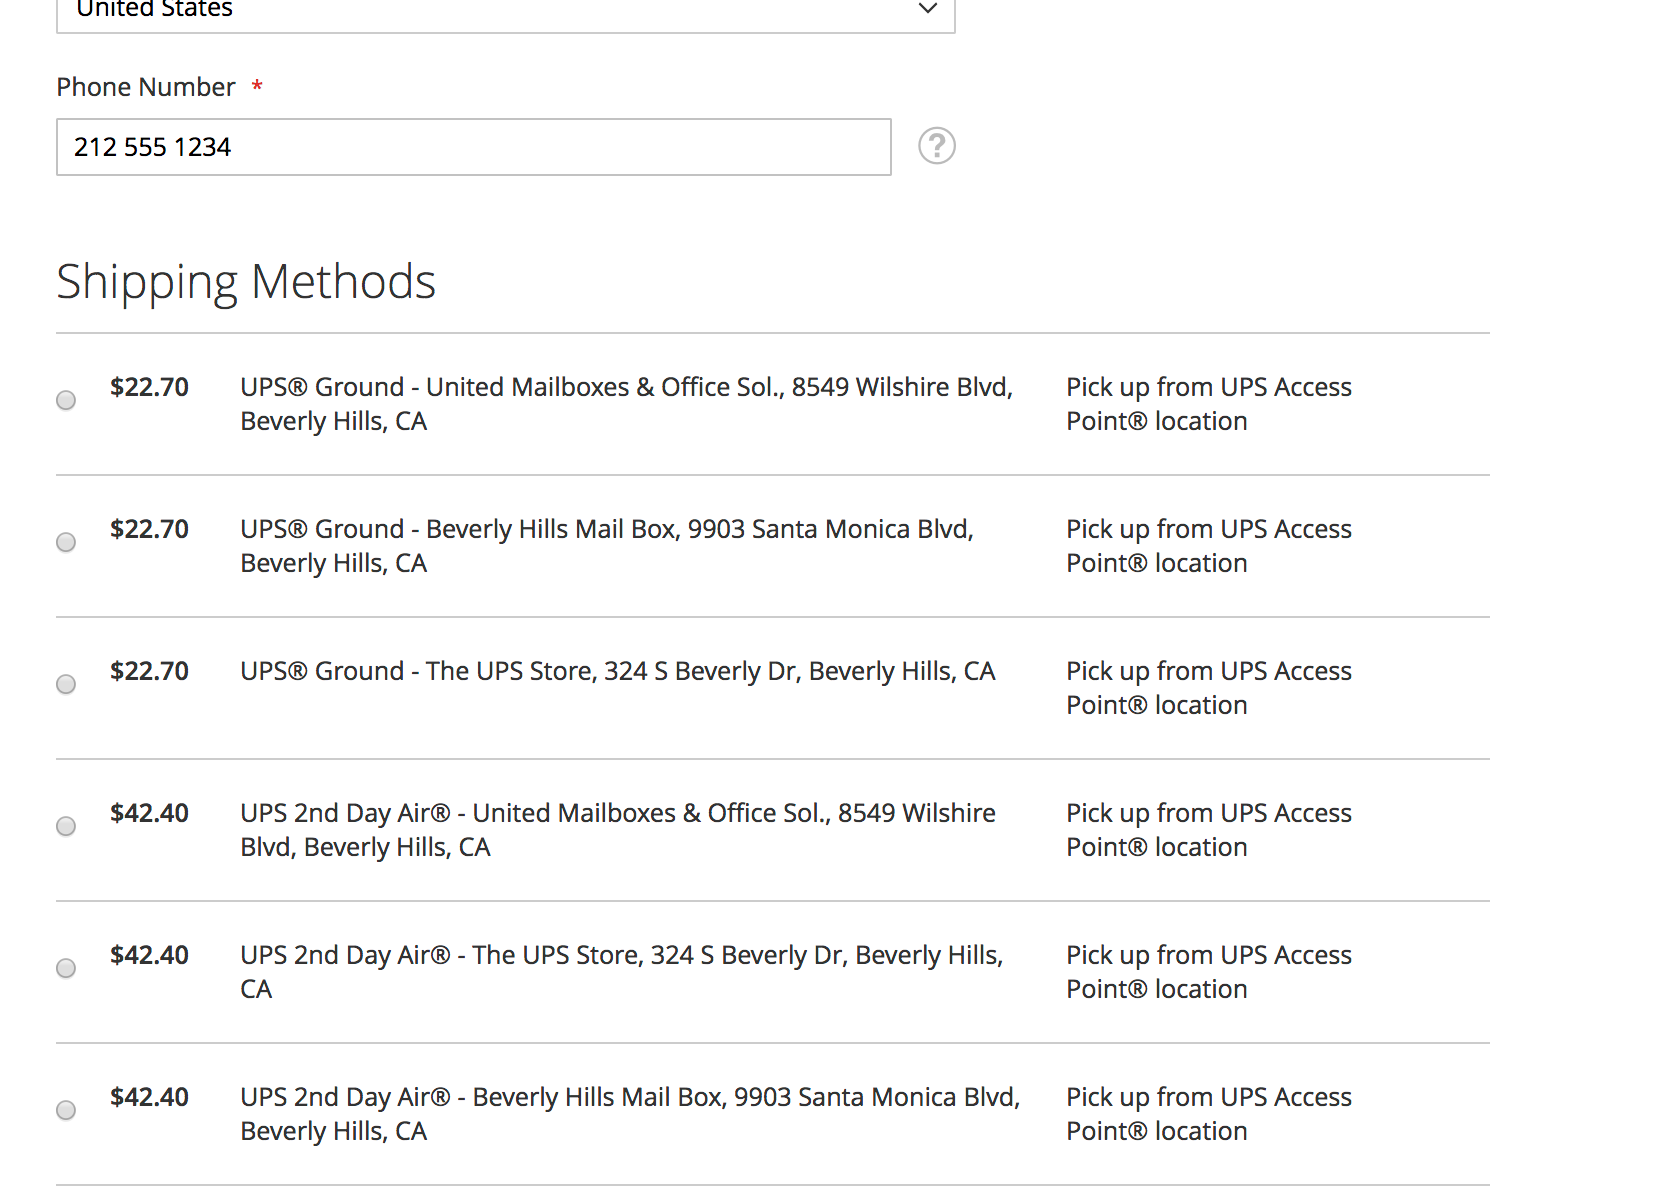
Our UPS Access Point® solution is available in versions of ShipperHQ for Magento 2, BigCommerce, Shopify and WooCommerce. You’ll see in the following screenshot, it allows customers to choose a pickup location from the checkout. We automatically display all the available pickup locations as separate shipping methods.
Requirements
Follow these directions to obtain/set-up the necessary credentials and add the UPS Access Point® carrier in ShipperHQ.
Register for UPS Access Point
- You need a UPS shipping account to use the service.
- Similar to the UPS Parcel carrier, you will want to Fetch your Latest UPS Invoice
Steps To Add This Carrier
- Go to the Carriers page in the ShipperHQ dashboard
- Click + New to add a new carrier
- Select Live Rate Carrier
- Search for and select UPS Access Point® Shipping
- Name this carrier (this name will be the name your customers see in the Checkout.)
- Success! Your UPS Access Point® carrier has now been added to your list of carriers in ShipperHQ.
- You may now proceed to Validate your UPS Access Point® (instructions are in the following section), or you can skip this step and choose to validate your carrier at another time. If you choose to skip validation you can begin to configure your carrier’s settings right away.
Steps to Validate This Carrier
In order for your live rate carrier to access your live rates, you will need to enter your carrier account credentials for UPS Access Point® and have them validated.
Validation, simply means that ShipperHQ was able to access the shipping account related to the credentials that you entered and retrieve rates.
If you choose to skip validation after adding your new carrier you will be reminded to add your credentials later.
To Validate your UPS Access Point® Carrier:
- Select Enter Credentials & Validate
- Read all of the License Agreement and select I Agree once you reach the bottom.
- Enter your account credentials and required information as printed on your invoice and click Continue
- Enter in your 6-digit account number and select whether you have received an invoice in the last 90 days or not, click Continue
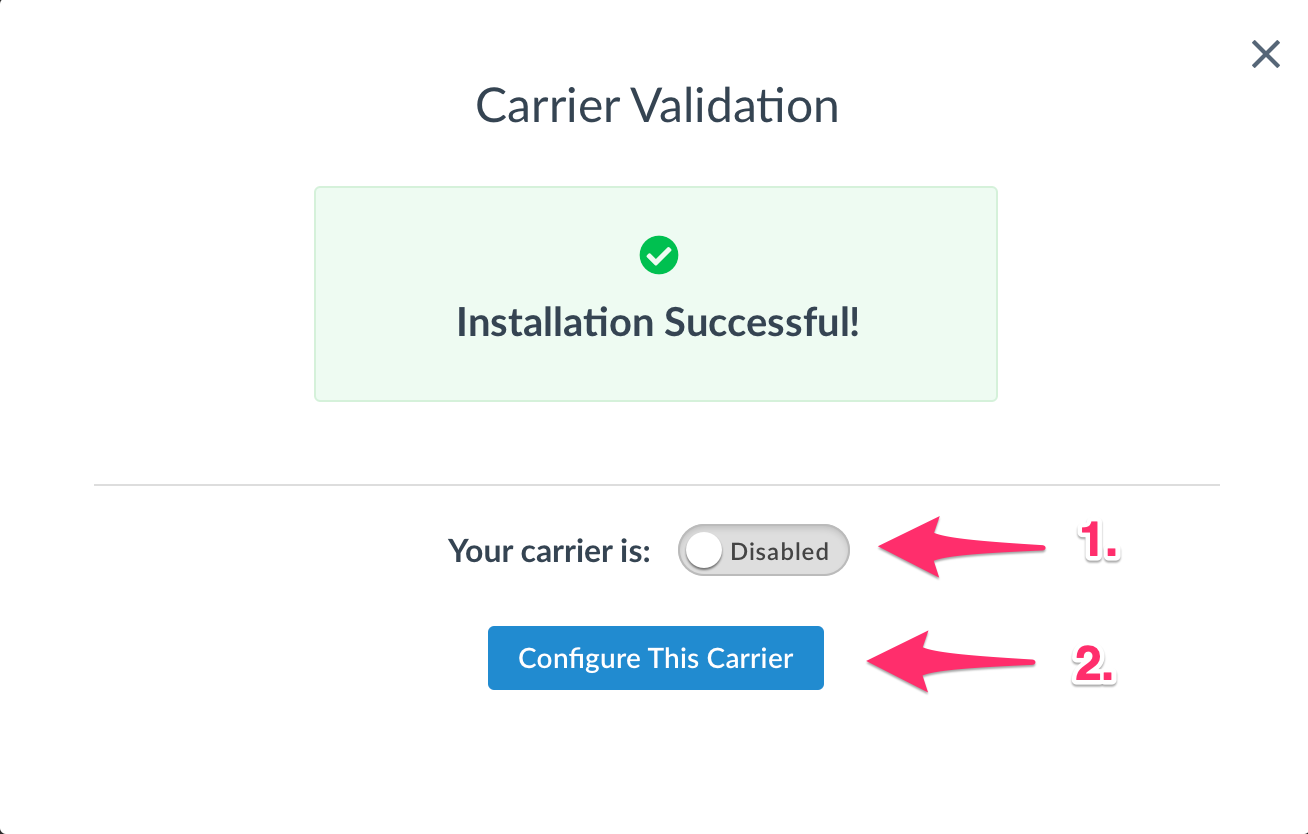
Note: Successful installation depends on the accurate entry of the account information required USPS. If you do not have the correct information you will not be able to validate your carrier and receive live rates. - If validation is successful, you will be presented with:
-
- The option to enable your carrier right away. (Enabling your carrier at this time will turn its rates on immediately even before you have made any configuration adjustments to it)
- Configure This Carrier. Continuing with this button will take you to the carrier’s configuration page. You can also enable the carrier from this page once you have saved your settings.
-
- If validation fails, the credentials you have already entered will still be saved so they will populate the form when you return. You can:
- Choose to try validation again and double-check that the information you entered is correct.
- Skip validation for now and complete it later. You will be reminded to complete validation later to get rates.
- Contact us if you are struggling to validate your carrier and you believe the credentials you are using are correct. We will be happy to help get you validated.
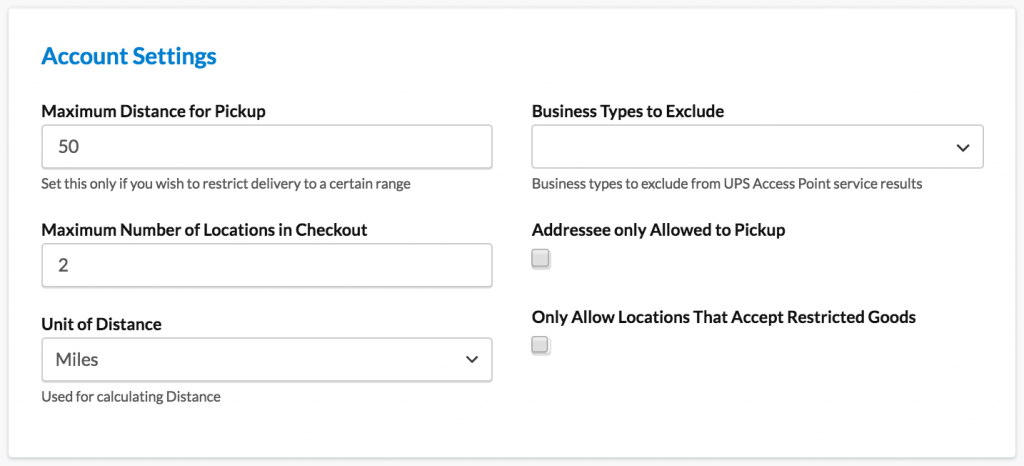
Filtering Pick Up Locations
UPS Access Point® service allows you, the merchant, to limit which type of location is offered as a potential delivery location. For example, you can limit options to only those locations that can accept restricted goods e.g. wine. You can also limit locations based on the business type.
These options are available on the Account Settings section under the Basic panel of your UPS Access Point® carrier.
Troubleshooting
If you receive a message that includes “UPS Account is not authorized for Hold for Pickup” this feature will need to be enabled on your UPS account. Your UPS account representative will be able to assist with enabling that on your account.